Saturday, March 30, 2013

Cupcake in an Egg Shell

        Egg shaped things are so cute, don't you think?  There are egg-shaped lip balm, chairs, and chocolates. And I had a little freak-out moment when I saw these egg-shaped marshmallows.  So naturally, egg-shaped cupcakes will be adorable.
I took these to a picnic.  The best way to transport them is in an egg carton, of course. 


       These cakes are baked in real egg shells.  And yes, you do use some of the egg within the shells to make the cake batter.  There's also a little "yolk" in the middle which I made from pastry cream.  The pastry cream also uses an egg that I emptied from a shell, and I found a pastry cream recipe that uses the whole egg, so I didn't have to worry about adding egg whites to the 16 de-shelled eggs I have in my fridge (omelettes, anyone?)
I had to use food coloring to make the filling more yolk-colored.
        The cake recipe I used was from The Cupcake Project, which also provided instructions for baking the cakes in the egg shells.  The cake is spongy and soft, with a great lemony flavor.  Perfect for spring. And it goes so well with the creamy filling.  The Cupcake Project's recipe uses a cream cheese filling for the yolk, but I didn't have any cream cheese so I used pastry cream instead.  Let me just say the pastry cream was amazing.


         You don't have to dye the egg shells, but I did.  It's really a lot of fun. To dye them:  Prepare one bowl for each color you want with 1/2 cup of boiling hot water mixed with 1 tbs of white vinegar and 6 drops of food coloring.  Drop in the egg shells and let soak for about 5 minutes, or until the desired shade is reached.  You can soak the eggs in more than one color, too. Let the egg shells dry with the hole side down on top of paper towels.
         
         To make these eggs even more irresistible, I decided to dip some de-shelled cakes in chocolate.  Just melt some chocolate in the microwave or in a bowl over simmering water, dip in the cakes, and freeze them until the chocolate is hardened.  Then you will have something similar to those Easter candies, only much, much awesomer.
Cross-section
     Here's how you make them:
Make a small hole at one end of the egg.  Corkscrew bottle openers work really well here.  And you know how when you squeeze an egg from all sides, it won't break?  Use that principle here.  Tightly grip the circumference of the egg as you poke the hole to avoid breaking the whole thing.  
Widen the hole a bit with your fingers.
Dump out the egg.  You'll need something pointy, like the end of a thermometer or a skewer to help the eggs come out.  Dump two eggs in one bowl, and one egg in another to use for the cake and filling recipes.  The rest, you can do whatever you want with.  It would be helpful to store them in containers of two so you can measure the eggs out for baking more easily.  And here's a helpful fact: one large egg is 2 oz in weight.
This process of emptying the eggs gets easier as you go along, trust me.
Rinse out the eggs and soak them in saltwater for 30 minutes. Now you can dye the eggs if you want.    
Make the pastry cream. 
You can tint the cream yellow or orange to make it more yolk-like.

For the batter, whip the eggs (reserved from when you dumped out the egg shells) with the sugar. 
Add the butter and lemon extract.
Fold in the dry ingredients.
Lighten the dough by folding in some sour cream.  (I had just enough sour cream left in my fridge from when I made my nest cupcakes last week!)
Put the eggshells in a cupcake pan, using foil to help them stand upright.  Fill the egg 1/4 way with batter, then 1/2 way with pastry cream, and finally 3/4 way with more batter.  Here, it's better to overfill than under-fill, because you can always trim off the excess later (and eat it). 
You can use a piping bag with a smallish tip and/or a squeezy bottle to pipe the batter into the egg shell.
Bake the egg shells, and they'll look something like this. Let them cool, trim off any excess if you want to, and then  get  kraken.  You can also carefully peel off the shells and dip the cakes in chocolate like in the pictures above.
   So there you go, cakes baked in egg shells.  They do take some time and effort to make, but the result is very interesting.  You eat these just as you would a hard-boiled egg.  Crack it, peel of the shell, and enjoy.  April Fools idea:  give someone one of these and tell them it's a hard-boiled egg.  It'll be priceless. 

    Enjoy!

Lemon Cupcakes with Pastry Cream Filling, Baked in Eggshells

makes 18 large eggs
adapted from Cupcake Project and Tartine

Ingredients

For the egg shells:
18 large eggs (shells only)
1/2 cup hot water +1 tbs vinegar + 6 drops food coloring (for each color you want to dye the eggs, optional)

For the pastry cream "yolks":
1 cup whole milk
1 tsp pure vanilla extract
1/4 tsp salt
2 tbs cornstarch
1/4 cup sugar
1 large egg (2 oz) (from empying egg shells)
2 tbs butter, cut into pieces
a couple drops orange food coloring (optional)

For the cake batter:
1 cup all-purpose flour
1/2 tsp baking powder
1/4 tsp baking soda
a pinch of salt
2 large eggs (4 oz) (from emptying egg shells)
1 cup sugar
1/2 cup (1 stick) unsalted butter, at room temperature
3/4 tsp lemon extract
1/2 cup sour cream

Directions

For the egg shells:
  1. Take something pointy (like a corkscrew bottle opener) and, while firmly holding the egg in all directions, poke a small hole in the bottom of the egg.  Widen the hole a bit with your fingers, and then  coax out the egg innards with a skewer or the end of a thermometer.  Repeat with the rest of the eggs, reserving 2 eggs in one bowl and 1 egg in a separate bowl (for the cake and filling).
  2. Rinse out the eggshells, and then soak in saltwater for 30 minutes.  Rinse again with cold water to remove the salt.  Dye the eggshells by soaking them in the hot water/ vinegar/ food coloring mixture for about 5 minutes.  
  3. Let the eggshells dry for a bit with the hole side facing down on top of paper towels.
  4. Place the eggshells in a cupcake tin, wrapping squares of aluminum foil around them to help them stand up straight.
For the pastry cream:
  1. In a small saucepan, combine the milk, vanilla, and salt.  Bring to a boil over medium heat.
  2. Meanwhile, whisk together the eggs, cornstarch, and sugar.  Slowly add the milk mixture in a thin stream, whisking constantly.
  3. Return the mixture to the saucepan and cook over medium heat, whisking constantly, until the mixture thickens and starts to boil.
  4. Remove from heat and let cool for 10 minutes.  Then stir in the butter and optional food coloring until combined.  Set aside.
For the cake batter:
  1. Whisk together the flour, baking soda, baking powder, and salt in a small bowl.
  2. In a medium bowl, beat together the eggs and sugar on high speed, until light and fluffy.  Add the butter and lemon extract and mix until well combined.
  3. Slowly stir in the dry ingredients until just incorporated.
  4. Fold in the sour cream.
For assembly:
  1. Preheat oven to 350*F
  2. Fill 2 piping bags fitted with small tips with the batter and the pastry cream.  
  3. Pipe batter into the eggshells until they are 1/4 full.
  4. Pipe pastry cream into the eggshells until they are 1/2 full.
  5. Pipe more batter into the eggshells until they are 3/4 full.
  6. Bake for 20 minutes in preheated oven.
  7. Let cakes cool, crack, and enjoy.
  8. If desired, you can carefully remove the shells after the cakes are baked, dip the cakes in melted chocolate, and freeze until the chocolate hardens to make candy eggs.  


Friday, March 29, 2013

Hot Cross Buns


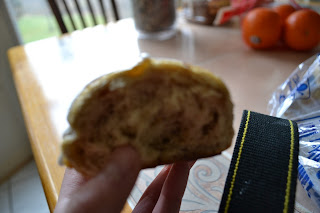
     So apparently, hot cross buns are an actual food.  Before, I just that they were the words to the song that everyone who plays an instrument has heard at some point.  A hot cross bun is a buttery, golden bun filled with spice and dried fruit.  However, hot cross buns are not actually eaten hot.  You have to wait for them to cool before frosting or the icing will melt.  But they are hard to resist when they are fresh out of the oven.
   

     These treats are a tradition to make on Good Friday, though I haven't learned that until this year.  I've never actually had a hot cross bun before.  The icing cross is not just a sweet decoration; it symbolizes Christ.  Hot cross buns are the subject of many superstitions, like buns baked on Good Friday will never go bad, and a hot cross bun in your kitchen will make sure that all your breads rise.  I don't know how I didn't know any of this before.  

      Hot cross buns are really easy to make, too.  I just threw all of the ingredients into a bread machine, shaped the dough and baked it, and then frosted the buns.  If you don't have a bread machine, I included instructions for mixing by hand.  It really doesn't take that much work.  You do need to let the dough rise for some time (2-1/2 hours), though. 
In the bread machine.
Dough cutlets.
Ready for baking.
Fresh out of the oven.
     You can change the spices to your liking, but 2 teaspoons is the recommended total amount for spice. The combination in this recipe is amazing.  Cardamon is often found in hot cross buns, but I didn't have it and it was expensive, so I used coriander instead, which gives these buns a lovely flavor.  I also used a mix of raisins instead of the normal currants.  I have a bunch of raisins left from making those oatmeal raisin cookies.
Enjoy!

Hot Cross Buns

makes 16 buns
adapted from Simply Recipes

Ingredients

For dough:
2-1/2 tsp (1/4 oz) active dry yeast 
3/4 cups warm milk (I used 2%)
3-1/4 to 3-1/2 cups all-purpose flour
1/4 cup plus 1 tsp granulated sugar
1/2 tsp cinnamon
1/2 tsp ground coriander
1/2 tsp allspice
1/4 tsp ground cloves
1/4 tsp nutmeg
1 tsp salt
4 tbs unsalted butter, softened
2 eggs, room temperature
3/4 cup currants (or raisins, or candied citrus peel)
2 tsp grated orange zest
For glaze:
1 egg
1 tbs milk
For icing:
1 tsp milk 
3 to 4 tbs confectioners sugar

Directions

  1. If using a bread machine on the dough setting, place all ingredients for the dough in the bread machine pan in the order recommended by the manufacturer; press start. Let dough rise for an extra hour after the cycle ends, until it is double. Skip to step 7.
  2. In a bowl, stir together 1/4 cup of warmed milk and 1 tsp of sugar.  Sprinkle the yeast over the milk and let sit for 5 minutes, until foamy.
  3. In a large bowl, whisk together 3 cups of flour, and the salt, spices, and 1/4 cup of sugar.
  4. Create a well in the flour and add the foamy yeast, softened butter, eggs, and the remaining milk. Mix until well incorporated.  Add dried fruit and orange zest.
  5. On a floured surface, or with a dough hook, knead the dough, adding additional flour by the tablespoon.  Knead until the dough is slightly tacky, but doesn't stick to your fingers. 
  6. Place the dough in a greased bowl and cover with plastic wrap.  Place somewhere warm and let the dough rise until double, 2 hours. 
  7. On a floured surface, press down on the dough to gently deflate it.  Roll the dough into a log and cut into 16 equal pieces (it's easiest to cut the log in half a bunch of times.)  Roll each piece into bun and place each bun on a lightly greased baking sheet, spacing them apart 1 to 1-1/2 inches.  Cover with plastic wrap and let rise until double, 30-40 minutes.
  8. Preheat the oven to 400*F.  Whisk together the egg and milk for the glaze, and brush the glaze on top of the buns.  Make sure that you cover the whole bun.  Bake in oven for 10-12 minutes, until light golden brown. Remove from oven and let cool for 1-2 minutes on the baking sheet.  Transfer to a wire rack to cool completely before frosting. I suggest covering the bread with a towel while it cools, so that the crust stays tender, and so nobody passing by decides to steal one.
  9. Whisk together the milk and sugar for the icing.  The icing will be thick.  Fill a ziplock bag with the icing and snip off the corner.  Pipe the icing onto the cooled buns in a cross shape.


Thursday, March 28, 2013

The Quest for the Perfect Oatmeal Raisin Cookie: Day 3

Left: Whipped's cookie
Right: Paula's cookie
Previously on The Quest for the Perfect Oatmeal Raisin Cookie:

     Spring Break is finally here today!  I know most other schools got out a week ago. Spring break means lots of time for baking and blogging, and that there's only one quarter of Freshman year left.  I don't know how I feel about that next part.  
      So today I bring you the last two recipes by other people that I will be testing.  Next, I will combine all the good aspects into one cookie, the one we're all waiting for.  Since Good Friday is tomorrow and Easter is this weekend, the ultimate oatmeal raisin cookie recipe may have to wait until next week, though.  Don't panic, it's worth waiting for.  

      This first recipe is by the famous Paula Deen and can be found here.  I'm sure you've heard of her.  I remember she made this crazy Krispie Kreme doughnut breakfast sandwich once.  It was like the epitome of unhealthfulness.  But it's not like her oatmeal raisin cookies are that bad for you, though there is more butter than usual. This recipe also has some nice PEE-cans, as Paula likes to call them.  It's pretty interesting how in this recipe, you put soak the pecans and raisins in water and then microwave the mixture for 90 seconds.  The resulting mix is delicious.  Also, the higher amount of butter and smaller amount of oats in the cookie results in a flatter cookie that spreads more when baked.


Name of Recipe: Paula Deen's Oatmeal Raisin Cookie
Time: 45 minutes
Yield: 3-4 dozen
Special Characteristics: more butter, less oats; has pecans; raisins and pecans are soaked
Taste: lots of good cinnamon flavor; nutty from pecans; buttery; very home-like taste
Texture: crispy, crunchy, a bit of softness in the middle
Appearance: lacy edges, very flat and spread out
Effort: easy to make
Overall Grade: B-
Pros: I like the pecans and the cinnamon
Cons: they are very flat-looking and don't have any chewiness

     This next recipe is from the food blog Whipped and the recipe can be found here.  The recipe is titled "The Best Oatmeal Raisin Cookies."  They're great, but I wouldn't say that they are the best.  They are a lot different from the oatmeal raisin cookie I'm used too, since they lack cinnamon and instead have a strong dark brown sugar flavor.  These cookies also use craisins in addition to raisins, which add some tang.  I adore dried cranberries.  The old-fashioned oats add a nice texture contrast to the chewiness of the buttery cookie, but I feel that the cookie needs a bit more oats.  The cookie feels like a chocolate chip cookie.  The recipe, like Paula Deen's, calls for 2 sticks of butter, but this cookie has more sugar. The dough is also refrigerated, which is supposed to make the cookie thicker.  Overall, I liked this cookie better than Paula's, but it still could use some improvement.


Name of Recipe: Whipped's "The Best Oatmeal Raisin Cookie"
Time: 45 minutes
Yield: 24-28 large cookies
Special Characteristics: has cranberries, more butter and sugar, old fashioned oats, dark brown sugar, and no cinnamon; dough is refrigerated for 10-15 minutes; cookies are not completely baked through in the oven
Taste: ruled by dark brown sugar and a vanilla taste; a bit too sweet
Texture: soft and chewy, slightly crisp outside
Appearance: deep brown, wrinkled edges; round and large
Effort: creaming the butter takes more effort because of the higher sugar to butter ratio; the dough has to be rolled into balls by hand
Overall Grade: A-
Pros: chewy, nice appearance, nice dark brown sugar flavor
Cons: needs more oaty flavor and some spice

     Now I'm done with testing other people's recipes, and I have to formulate my own.  Making all these recipes was a really nice, educational experience for me and I think I now know what makes an oatmeal raisin cookie good.  On the other hand, now I have a ton of oatmeal raisin cookies at my house, even though I halved each recipe!  I think I'm going to have a break from my favorite cookie for a while after this.  

Enjoy!

Paula Deen's Oatmeal Raisin Cookie

makes 3-4 dozen cookies

Ingredients

1 cup pecans, chopped
1 cup raisins
2 sticks butter, at room temperature
1 cup packed brown sugar
1/2 cup granulated sugar
1 tsp vanilla extract
2 eggs
1-1/2 cups unbleached all-purpose flour
1 tsp baking soda
1 tsp cinnamon
1 tsp salt
2 cups old-fashioned oats, uncooked

Directions

  1. Preheat the oven to 350*F.  Line a baking sheet with parchment paper.
  2. Add 1/2 cup water to the pecans and raisins, then microwave for 90 seconds.  Allow the raisins and pecans to sit on the counter for about 10 minutes.  Drain the raisins and pecans and set aside.
  3. In a large bowl, combine the butter and the sugars and beat with an electric mixer until very creamy.  Add the vanilla extract and eggs, and beat again until mixed.
  4. In a small bowl, sift together the flour, baking soda, cinnamon, and salt.  Add it to the butter mixture.  Add the oats, raisins, and pecans.  Mix together.
  5. Drop heaping tablespoons of batter onto the prepared baking sheet.  Leave plenty of room for the cookies to spread.  Bake until the cookies are cooked in the middle, 10-12 minutes.  Remove the cookies from the oven. Cool on the baking sheet for about 3 minutes before transferring to a wire rack to cool completely. 

Whipped's "The Best Oatmeal Raisin Cookie"

makes 24-28 large, 3-inch cookies

Ingredients

1-3/4 cups all-purpose flour
1 tsp salt
1 tsp baking soda
1 cup (2 sticks) unsalted butter, at room temperature
1 cup granulated sugar
1 cup dark brown sugar
2 eggs
2 tsp pure vanilla extract
3 cups old fashioned oats
3/4 cups raisins
3/4 cups dried cranberries

Directions

  1. Preheat your oven to 350*F.  
  2. Combine flour, baking soda, and salt in a bowl.  Whisk to combine well. 
  3. In a separate bowl beat room temperature butter and both sugars until light and fluffy, about 4 minutes. Add room temperature eggs, one at a time, beating each until fully incorporated.  Add vanilla and combine.
  4. Add the flout mixture little by little, mixing until fully incorporated.  Use a large wooden spoon to mix in the oats and the raisins and cranberries.
  5. Put the dough in the refrigerator while you prepare your baking sheets, lining each with parchment paper.  After about 10-15 minutes, remove the dough from the refrigerator and spoon out large scoops of dough making balls about 1 to 1 1/2 inches thick.  
  6. Place 6 balls on each pan so they won't be too close together.  Lightly press each ball to make a disk that is about 1/2 inch thick.
  7. Bake the cookies for 10-12 minutes, turning the pans half way through.  When you remove them from the oven, the edges should be lightly brown and the inside should look uncooked.  Leave the cookies on the hot pan for 10 minutes when you take them out of the oven.  They will continue to cook and the middle will firm up.  

Wednesday, March 27, 2013

The Quest for the Perfect Oatmeal Raisin Cookie: Day 2

   
Left: Annie's Eats' Cookie
Right: Cuisine Magazine's Cookie
Previously on The Quest for the Perfect Oatmeal Raisin Cookie:


     Judging cookies is really hard.  That is one thing I learned from testing these oatmeal raisin cookie recipes.  I don't like being so negative in my reviews, but I kind of have to here.  It's for the good of finding the perfect recipe for oatmeal raisin cookies.

    So here we have Annie's Eats' "The Ultimate Oatmeal Raisin Cookie."  This recipe uses some pretty fancy ingredients like mixed raisins and real vanilla beans.  Though I did rather like the appearance of those little black speckles of vanilla bean seeds in my cookie, I decided that vanilla beans were not essential and vanilla extract would work just as well.  Normal raisins would be a good substitute for mixed raisins too, though the fancier raisins did have a lovely flavor similar to that of sunshine.
     Aside from using the mixed variety of raisins, this recipe does something unique with its dried grapes.  The recipe tells you to soak the raisins in hot water for half an hour to re-hydrate them.  This produced a lovely, moist cookie with nice plump raisins which actually somewhat burst when you bit into them.  Another technique in this recipe was refrigerating the dough before hand, which I believed made the cookie nice and thick.
Name of Recipe: Annie's Eats "The Ultimate Oatmeal Raisin Cookie"
Time: 30min + 30min chilling time and 10 minutes thawing
Yield: 2 dozen
Special Characteristics: has vanilla bean seeds, mixes raisins, and kosher salt; refrigerates dough; soaks raisins in hot water
Taste: Spicy (it reminds me a bit of pumpkin pie without the pumpkin); oat-y; nice hint of salt; flavorful, bright raisins
Texture: Soft and chewy; plump raisins
Appearance: Dark, circular, lumpy, thick but flat, little air holes
Effort: moderate: worth the effort but takes some time
Overall Grade: B+
Pros: bold flavor, chewy, good use of kosher salt, plump raisins
Deltas: uses ingredients that aren't always on hand; could use more texture; not the most attractive cookie

     Next I will be judging Cuisine Magazine's "The Best Oatmeal Raisin Cookie." Food.com claims that "they're better than any you've tried before."  The recipe may seen ordinary at first, but at a closer glance you'll see it's much different than many other oatmeal raisin cookie recipes.  First of all, it uses dark brown sugar instead of the usual light brown sugar.  Dark brown sugar has a higher amount of molasses in it, thus giving the cookie an intense, deep flavor (and a beautiful tan color).  Unexpectedly, this cookie doesn't have any cinnamon or nutmeg in it, but the flavor of the dark brown sugar definitely compensates.  Also, the recipe calls for kosher salt, which gives the sweetness a nice balance, and equal amounts of baking soda and baking powder.  Most recipes call for just baking soda, but I believe that the inclusion of both leaveners is what contributes the cookie's attractive cracked surface.  Believe me, this cookie is attractive.  

Name of Recipe: Cuisine Magazine's "The Best Oatmeal Raisin Cookie"
Time: 26 minutes
Yield: 3 dozen
Special Characteristics: has dark brown sugar, kosher salt, and a mix of baking soda and baking powder; doesn't have cinnamon
Taste: the deep flavor from the brown sugar is the star of this cookie, combined with the oats;  also has a hint of salt and a buttery flavor
Texture: crunchy outside, chewy inside; a bit floury
Appearance: crackly top, tan color, nice thickness, very round cookies
Effort: I really like how instead of creaming the butter and sugar separately, you just throw all the wet ingredients in a bowl and cream them together; this recipe is really easy to follow and quick to make
Overall Grade: B+
Pros: nice intense flavor, quick and easy to make, very attractive
Deltas: Could use some spice and less crumbliness 

     So there we go.  There wasn't a clear winner this round.  I enjoyed the bold flavor of the first cookie, but as I took a bite of the second cookie I just couldn't decide which was better.  Both recipes had their pluses and minuses.  Anyways, this isn't about comparing recipes, it's about finding certain ingredients/ techniques that work and then putting them together in one perfect oatmeal raisin cookie.

Enjoy!

Annie's Eats' "The Ultimate Oatmeal Raisin Cookie"

Yield: 2 dozen
Recipe from Annie's Eats

Ingredients

1 cup plus 1 tsp (144 grams) all-purpose flour
1 tbs (7.7 grams) ground cinnamon
1-1/2 tsp (7.4 grams) baking soda
1-1/4 tsp (3.6 grams) kosher salt
11 tbs (5.5 oz or 155 grams) unsalted butter, at room temperature
3/4 cup (140 grams) light brown sugar
5-1/2 tbs (69 grams) granulated sugar
1/4 cup (62 grams) eggs (about 2 large eggs)
2 vanilla beans, split lengthwise
1 tbs vanilla extract
2 cups (155 grams) old-fashioned oats
1 cup (156 grams) mixed raisins, re-hydrated (soak in in hot water for 30 minutes, then drain and blot out excess moisture with towels)

Directions

  1. In a medium bowl, combine the flour,  cinnamon, baking soda, and salt; whisk to blend.  In the bowl of an electric mixer, beat the butter on medium speed until smooth and creamy, about 2-3 minutes.  Add the sugars and beat on medium-high speed until light and fluffy, about 3-4 minutes.  Scrape the seeds from the vanilla beans into the bowl and mix to blend in.  With the mixer on medium-low speed, blend in the vanilla extracts and eggs just until incorporated.
  2. Scrape down the sides of the bowl.  With the mixer on low speed, add the flour mixture in two additions, mixing just until incorporated.  With the mixer on low speed, stir in the oats and raisins, mixing just until evenly incorporated.  Cover and refrigerate dough for 30 minutes.
  3. Preheat the oven to 325*F.  Remove the cookie dough from the refrigerator and let stand at room temperature for about 10-15 minutes.  Line baking sheets with parchment paper or silicone baking mats.  Use a large cookie dough scoop (about 3 tbs) to drop the dough in rounds on the baking sheets, about 2-3 inches apart.  Bake, rotating the pans once halfway through baking, until the cookies are just golden brown and nearly set, about 17 to 18 minutes.  Let cool on baking sheets.  Repeat with remaining dough.

Cuisine Magazine's Oatmeal Raisin Cookie

Yield: 3 dozen
Recipe from Food.com

Ingredients

Whisk together and set aside:
2 cups all-purpose flour
1 tsp baking soda
1 tsp baking powder
1 tsp kosher salt
Cream wet ingredients:
1 cup unsalted butter, softened
1 cup sugar
1 cup dark brown sugar, firmly packed
2 large eggs
2 teaspoons vanilla
Then stir in:
3 cups old-fashioned oats
1-1/2 cups raisins

Directions

  1. Preheat oven to 350*F.
  2. Whisk dry ingredients; set aside.
  3. Combine wet ingredients with a hand mixer on low.
  4. To cream, increase speed to high and beat until fluffy and the color lightens.
  5. Stir the flour mixture into the creamed mixture until no flour is visible.
  6. Overmixing develops the gluten, making a tough cookie.  Now add the oats and raisins; stir to incorporate.
  7. Fill a #40 cookie scoop and press against side of bowl, pulling up to level dough (to measure 2 tbs of dough)
  8. Drop 2 inches apart on a baking sheet sprayed with non-stick spray.
  9. Bake 11-13 minutes (on center rack), until golden brown, but still moist beneath cracks on top.
  10. Remove from oven; let cookies sit on baking sheet for 2 minutes before transferring to a wire rack to cool completely.


Monday, March 25, 2013

The Quest for the Perfect Oatmeal Raisin Cookie: Day 1


Left: Quakers' Vanishing Oatmeal Raisin Cookie
Right: Brown Eyed Baker's Chewy Oatmeal Raisin Cookie
Can you spot the difference?
Left: Quaker's Cookie Dough  Right: Brown Eyed Baker's Cookie Dough
Previously on The Quest for the Perfect Oatmeal Raisin Cookie:    Introduction

      Here we have two very different specimens of oatmeal raisin cookie (recipes are at the end of the post).
      To the left is the classic "Quaker's Vanishing Oatmeal Raisin Cookies," which you can find the recipe for on a typical box of Quaker's oatmeal.  This is the recipe my mom always used, except I think she added a lot more flour.  It's a classic recipe with no real surprises, and the instructions are very easy to follow. Here are the scores:

Name of Recipe: Quaker's Vanishing Oatmeal Raisin Cookies
Time:  28min  Yield: 3 dozen cookies
Special Characteristics: uses quick-cooking oats 
Taste: nice sweetness and vanilla flavor; could use more salt to balance sweetness
Texture: Crisp on the outside, chewy on the inside; needs to be chewier
Appearance: lumpy from quick-cooking oatmeal, flat and circular
Effort:  Quick, easy, worth the effort (my little 4yr-old brother even helped me to make these :) )
Overall Grade: A-
Pros: quick and easy, uses ingredients on hand, good vanilla flavor and sweetness, nice crunchy exterior
Deltas*: not very attractive, not chewy enough, not enough balance in flavors

(* Apparently, deltas are just a nicer way of saying "cons")

      So next we have Brown Eyed Baker's "Chewy Oatmeal Raisin Cookies".  Brown Eyed Baker is another food blog which has a lot of great recipes.  She says that these cookies are "thick and chewy" and "absolutely incredible".  I agree that the cookies are great, but they did have some issues.  Next time I would probably make the cookies bigger and decrease the baking time.  

Name of Recipe: Brown Eyed Baker's Chewy Oatmeal-Raisin Cookie
Time: 45 min to 1hr (cookies taste best once completely cool)
Special Characteristics: uses old-fashioned oats, has nutmeg instead of cinnamon, doesn't have vanilla, more butter and sugar, has baking powder instead of baking soda
Taste: Very interesting but gentle nutmeg flavor, but kind of monotone; flavor improves the next day; raisins were kind of sour; could use more sweetness despite the relatively high sugar content
Texture: Kind of hard despite name of recipe; raisins were dry; too many oats (a lot were left over because they couldn't fit into the cookies)
Appearance: Looks soft and fluffy; nice golden color; oats more pronounced; looks cake-like
Effort: You have to shape the cookies by hand versus just dropping spoons of dough onto the sheet; takes longer to bake and needs to cool before you eat them
Overall Grade: B-
Pros: good appearance; very good nutmeg flavor
Deltas: too many oats; not really worth the effort; hard to shape dough into balls; needs cooling time

     The verdict:  Both cookies were delicious and had certain characteristics which made them special.  However, my judging panel and I would have to say that out of the two, Quaker's cookies are better.  The ease of the recipe and vanilla-ly flavor of the cookie just turned out to be victorious over the also pretty good Chewy Oatmeal Raisin Cookie. 

Quaker's Vanishing Oatmeal Raisin Cookies

recipe from here
Yields 3 dozen cookies

Ingredients

1/2 cup (1 stick) plus 6 tbs butter, softened
3/4 cup firmly packed brown sugar
1/2 cup granulated sugar
2 eggs
1 tsp vanilla
1-1/2 cups all-purpose flour
1 tsp baking soda
1 tsp ground cinnamon
1/2 tsp salt 
3 cups quick-cooking oats (the recipe says you can also use old-fashioned oats)
1 cup raisins

Directions

  1. Heat oven to 350*F.
  2. In a large bowl, beat butter and sugars on medium speed of an electric mixer until creamy. Add eggs and vanilla. Beat well.
  3. Add combined flour, baking soda, cinnamon, and salt; mix well.
  4. Add oars and raisins; Mix well.
  5. Drop dough by rounded tablespoonfuls (or a small cookie scoop) onto ungreased cookie sheets.
  6. Bake 8-10 minutes, until light golden brown. Let cool 1 minute on cookie sheets, then cool on wire rack.  Store tightly covered.

Brown Eyed Baker's Chewy Oatmeal Raisin Cookie

recipe from here
Yields 18 large cookies

Ingredients

1-1/2 cups (7-1/2 oz.) unbleached all-purpose flour
1/2 tsp baking powder
1/4 tsp freshly grated nutmeg (I used pre-grated nutmeg)
1/2 tsp salt
16 tbs (2 sticks) unsalted butter, softened but still cool
1 cup (7 oz) packed light brown sugar
1 cup (7 oz) granulated sugar
2 large eggs
3 cups old-fashioned rolled oats
1-1/2 cups raisins

Directions

  1. Adjust the oven racks to the low and middle positions and heat the oven to 350*F.  Line 2 large baking sheets with parchment paper or spray with nonstick cooking spray.
  2. Whisk the flour, baking powder, nutmeg, and salt together in a medium bowl.
  3. Either by hand or with an electric mixer, beat the butter on medium speed until creamy.  Add sugars; beat until fluffy, about 3 minutes.  Beat in the eggs, one at a time.
  4. Stir in the dry ingredients into the butter-sugar mixture with a wooden spoon or large rubber spatula.  Stir in the oats and raisins.
  5. Working with a generous 2 tbs of dough at a time, roll the dough into 2-inch balls.  Place the balls on the prepared baking sheets, spacing them at least 2 inches apart. 
  6. Bake until the cookie edges turn golden brown, 22 to 25 minutes, rotating the baking sheets front to back and top to bottom halfway through the baking time.  Let the cookies cool on the baking sheets for 2 minutes.  Transfer the cookie with a wide metal spatula to a wire rack.  Let cool at least 30 minutes. 

*Note:  Sources of error in this test were avoided as much as possible.  The directions of each recipe were followed exactly and measurements were made by weight when possible. 

Sunday, March 24, 2013

The Quest for the Perfect Oatmeal Raisin Cookie: Introduction

     The question I most like to ask people is simply "What's your favorite type of cookie?"  I guess to me, it just tells me a lot about their personalities.  For instance, there are the daring double-chocolate chip fans, mellow white chocolate chip macadamia nut lovers, and traditional chocolate chip advocates.  Personally, I have a soft spot for a good oatmeal raisin cookie.
      Why oatmeal raisin?  While I was growing up as a younger kid, oatmeal raisin cookies were the treat my mom baked for me most often.  They have always been something to indulge in on Sunday nights, right before I had to face another week of having to wake up early and cramming for tests.  Now, I'm addicted to the nutty flavor of the oats combined with the soft, chewy raisins in oatmeal raisin cookies.
       Recently, though, I have been searching for the perfect oatmeal raisin cookies.  There are so many variations on a classic cookie that I don't know which recipe to bake.  There are recipes for crisp cookies and chewy cookies, recipes that soak the raisins in water and recipes that don't, and recipes for cookies with chocolate chips, nutmeg, chopped apples, pecans, quick oats, old-fashioned oats, and even vanilla beans.  See how daunting this quest I have set upon is?
        This quest thing is probably going to be just like cookie quest in 6th grade and my science project in 7th/8th grade.  I remember in 6th grade I had to bake six dozen chocolate chip cookies for my classmates to sample during cookie quest (some competition thing where different classes try to have the best cookie stand, which was actually pretty fun).  In 7th and 8th grade, I did a science project on how pH level of cupcake batter affects the height of the cupcake, and I had to spend an entire weekend baking 10 dozen cupcakes.  I'm so glad that's over.
        So throughout the next week or two, I will be testing various oatmeal cookie recipes from numerous sources.  I will probably bake a half-batch of two different recipes at a time and compare them, then make special notes of their ups and downs.  When I have acquired enough knowledge on the characteristics of a good oatmeal raisin cookie, I will try to make my own recipe, combining what I like from different recipes.  Then we will have the perfect oatmeal raisin cookie.
         Before I start with the recipes,  I should say what in my opinion is a perfect oatmeal raisin cookie.  Though I am very open-minded, I do have some specific standards for a good oatmeal raisin cookie, such as:

  • They can't be too sweet.  Not like those store-bought ones that just taste like sugar cookies with raisins thrown in.
  • They have to have some chewiness.  They can't just be clumps of flour and oats that crumble when you bite into them.
  • They have to have some crispiness.  They need texture, and some flimsy cookie won't cut it.
  • They can't rely on chocolate.  These are oatmeal raisin cookies, not chocolate chip cookies.  If you really want to, you can add chocolate chips to the recipes yourself.
        So, let the quest begin!  

Saturday, March 23, 2013

Bird's Nest Cupcakes {Vanilla Cupcakes}

    Hi everyone!  The first day of spring was last...Wednesday, I think?  Spring's my favorite season (it's the season of my birthday!), and I'm glad it's finally here.  However, it still feels like winter here and the weatherman's calling for a couple of inches of snow on Monday.
    No wonder I've been sick all last week.  I guess you could call it "spring fever" (pun intended).
    Anyways, to welcome this so-called "spring," why not make some delicious vanilla cupcakes resembling little birds nests?   I've been in the mood for cupcakes all week.  And I've been planning to make these cupcakes since I saw my cupcake-themed calender's picture for March.  I really like cupcakes.
     So first I baked some vanilla cupcakes.  But not just any vanilla cupcakes, these are the perfect vanilla cupcakes.  The cupcakes that make your taste buds weep tears of happiness.  Except your tongue doesn't actually cry, because that would be gross.
     The cupcakes have a poignant vanilla flavor and soft, fluffy texture.  No other vanilla cupcake can compare.  The recipe has been genius-ly put together by the Cupcake Project blog.  It uses milk, sour cream, butter, and oil.  It's like a hybrid of all vanilla cupcakes.
      Then I whipped up some of my favorite chocolate fudge frosting.  I made half of the recipe found here.  But you can use any frosting you want, I just wanted a dark brown frosting for the nests.
       Nest, I spread some frosting on the cooled cupcakes (see what I did there?)  Make sure that the cupcakes are cool or else the frosting will melt. Then I used a grass piping tip to pipe a ring around the border.  I added some jumbo-sized quins from a craft store to look like eggs.  I remember that once when I was younger, I found a birds nest with a blue robin egg in it and I was absolutely fascinated by it.  I then proceeded to go home and put a hard-boiled egg in a pile of blankets, hoping that the egg would some day hatch.
Mix together the sugar and vanilla bean seeds.
Whisk together the dry ingredients, then stir in the sugar and butter.
Whisk together the wet ingredients.
Combine wet and dry.
Slowly stir in milk.
Pour into baking cups.
Bake in the oven.
Let cool. 
Frost.
Pipe on the "nest"
Add sprinkles.
Enjoy!

       So, happy spring, everyone!  Enjoy!

Perfect Vanilla Cupcakes

makes about 16 cupcakes
recipe from  The Cupcake Project

Ingredients


1 cup (225 grams) granulated sugar
1 vanilla bean
1 3/4 cups (175 grams) cake flour, not self-rising
1 1/2 teaspoons baking powder
1/2 teaspoon baking soda
1/2 teaspoon salt
1/4 cup (57 grams) unsalted butter, room temperature
2 large eggs, room temperature
1/3 cup (75 grams) full-fat sour cream
1/4 cup canola oil or vegetable oil (60 ml)
1 tablespoon pure (not imitation) vanilla extract
2/3 cup (160 ml) whole milk

Directions


  1. Preheat oven to 350 F.
  2. In a small bowl, combine sugar and seeds from the vanilla bean. ( Watch this video to learn how to get the seeds out of the bean.)
  3. Using the back of a spoon, move around the bowl and apply pressure to break up any clumps of seeds and to better infuse the vanilla flavor into the sugar. Set aside.
  4. In a medium-sized mixing bowl or bowl of a stand mixer, mix together cake flour, baking powder, baking soda, and salt.
  5. Add the vanilla bean sugar and mix until well combined.
  6. Add butter and mix on medium-low speed for three minutes.  Because there is so little butter, you'll end up with a very fine crumb texture.
  7. In a small mixing bowl, whisk together eggs, sour cream, oil, and vanilla extract until smooth.
  8. Add the egg mixture to the flour mixture and beat on medium speed until just combined.
  9. Slowly add milk and mix on low speed until just combined.  The batter will be liquid. 
  10. Fill cupcake liners just over 1/2 full.
  11. Bake for 14 minutes and then test to see if they are done. They are done when a toothpick comes out without wet batter stuck to it.  The cupcakes should appear white with specks of vanilla bean. They should not turn a golden brown.  If they are not done, test again in two minutes.  If they are still not done, test again in another two minutes.
  12. When the cupcakes are done, remove them immediately from the tins and leave them on a cooling rack (or just on your counter if you don't own a cooling rack) to cool.