Showing posts with label cake. Show all posts

Sunday, January 26, 2014

Rocket Ship and Moon Cake


I have been busy. 


Not too busy to bake, but too busy to come up with creative things to make and write up a post.  


Finally, though, I'm done with sports for the school year, so I won't be coming home from school at 7:00 pm any longer, I think. 


Yesterday, I made this birthday cake for my funny five-year-old brother, Aideng. He was happy with it. 


It was a vanilla layer cake with vanilla buttercream. My brother prefers vanilla just like I do!


To make the round moon, I baked one 8" layer, one 6" layer, and 2 thin layers in a pan I have that is in between those two sizes. I sacked them and frosted them, and the cake looked like an almost perfect orb. I covered this with grey fondant, and used a ball tool I had to make small craters.


For the rocket, I frosted 3 cupcakes together and refrigerated this until firm. Then I cut the cake into a cone shape, covered it with fondant, added red decals, and then added another layer of blue fondant. Next I just added wings and a yellow circle with the number 5. 


To finish the cake off, I made a little astronaut holding a flag made out of paper and a toothpick.


  Enjoy!

Saturday, November 2, 2013

Caramel Layer Cake


     This is a simple cake that I should have made a long time ago.


     Caramel cake is a classic Southern dessert, and I think that, as a borderline Southerner, I have been deprived of the privilege of eating this cake up to this point.


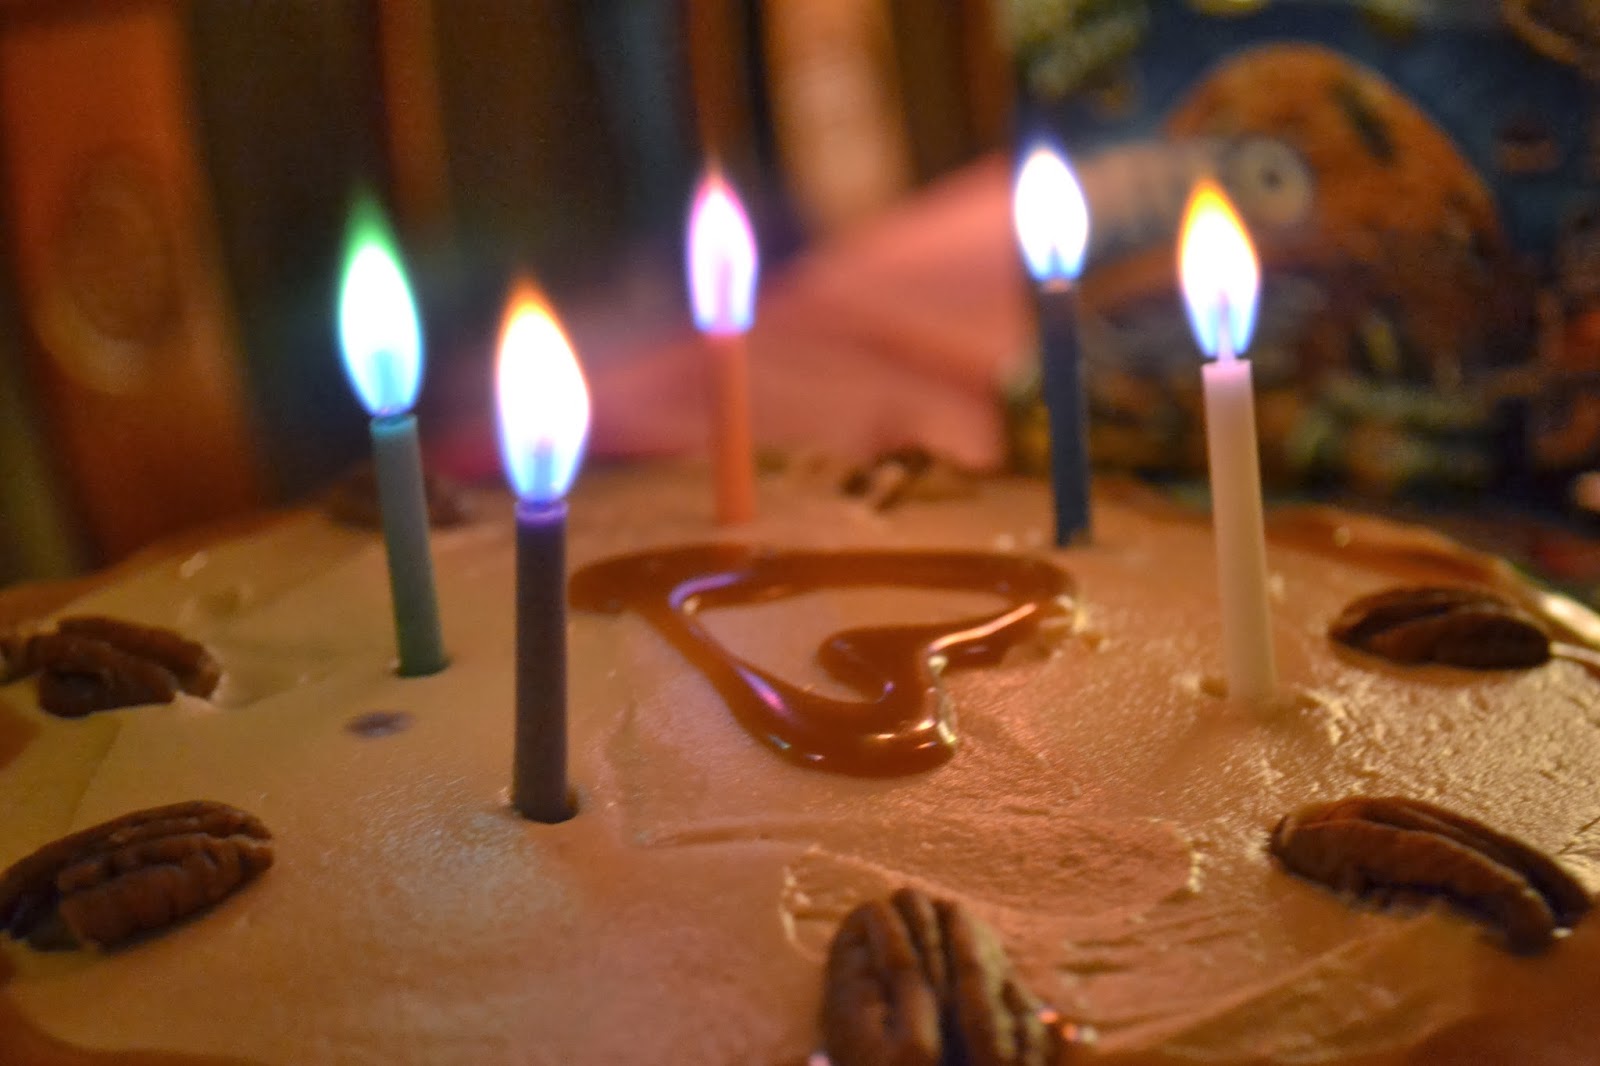
     I made this cake for my mom's birthday last weekend.  We also had colorful candles and Oreo ice cream!


     (My mom isn't turning 5, by the way.)

      I've been looking for a good caramel cake recipe for a while. The recipe I used was from the Galley Gourmet, and the cake did not disappoint.  The cake is a simple vanilla cake with a tender crumb, and the icing is the phenomenal part. Sure, it's really sugary (caramel is, after all, cooked sugar), but don't let that stop you.  Enjoy the full glory of it.

     I made a 2-layer cake to save time, instead of the 3-layer cake the recipe suggested.  You can use whatever cake pans you have.  Making the caramel sauce is really easy, but be careful and take it off the heat when it is golden brown or else it'll burn really quickly.

Caramel Layer Cake

Serves 10-12
Recipe adapted from The Galley Gourmet

Ingredients

For the Cake
1 cup unsalted butter, softened
2 cups granulated sugar
5 large eggs, at room temperature
3 cups self rising flour 
1 cup whole buttermilk, or 1tbs vinegar plus 1 cup whole milk
1 1/2 teaspoons pure vanilla extract
For the Caramel Frosting
2 cups granulated sugar
1/4 cup water
2 Tablespoons light corn syrup
1/2 cup cold butter
1 cup hot heavy cream
Pinch of kosher salt
1/2 teaspoon pure vanilla extract
1 cup unsalted butter, softened
6 cups confectioners' sugar
For Finishing (optional)
Toasted pecans

Directions

Make the Cake. Preheat the oven to 350* F.  Butter and flour 2 or 3 9" cake pans, and line with parchment or wax paper. 

Cream together the butter and sugar until light and fluffy. Add eggs, one at a time, beating well after each one. Alternate adding 1/3 of the flour with adding 1/2 of the buttermilk, and then stir in the vanilla. Divide the batter between the pans, smooth the tops, and bake for 25-30 minutes, until a toothpick comes out clean.

Let cool in the pan for 20 minutes, then remove the cake and let it cool completely.

Make the Caramel Sauce. Place the water and corn syrup in a small bowl and whisk until the syrup is dissolved. Place the sugar in a medium saucepan, and add the water, stirring just until everything is moistened. Heat over medium heat until all the sugar is dissolved (it will start bubbling) and increase the heat to medium-high.  If sugar crystals form on the side of the pan while you're cooking, brush them off with a wet pastry brush. Cook without stirring until the mixture is golden brown, no longer.  Remove the pan from the heat and add the cold butter, stirring until melted. Slowly stir in the heavy cream, then stir in the vanilla and salt.  

Let cool for at least one hour or refrigerate. Set 1/3 cup aside to pour on the cake after frosting it.

Make the Frosting.  Place all the caramel except 1/3 cup in a large bowl with the softened butter (make sure the caramel's cool or the butter will melt). Cream until smooth, and then gradually add the confectioners sugar, beating until fluffy.

Assemble. Spread the frosting between layers and top and sides of the cake layers.  Drizzle with the reserved caramel sauce.  Garnish with toasted pecans.


Thursday, August 15, 2013

Lemon Raspberry Layer Cake

     The third and final thing I baked for the fair was this lemon-raspberry cake. It's a good thing I took pictures because the frosting was messed up once I got to the fair.
        I only had to submit half of the cake, so my family and I got to eat the other half.  I also got to take a picture of the inside layers of the cake before I actually sliced it.  You can see the raspberries dotting the inside of the cake.

       The cake is a lemon sponge cake that has been moistened with a lemon syrup, and it is filled and frosted with lemon curd Swiss meringue buttercream.  There is also lemon curd and raspberries spread between the layers.  I used store-bought lemon curd since I was short on time (I had one day to bake 3 entries).  Plus, the lemon curds I have made in the past all had this sort of metallic taste, maybe because of the pan I used.  I had frozen raspberries in my freezer which I thawed to put on the cake, but fresh raspberries probably would have held their shape better.  

         The cake was fluffy and moist and the raspberries and lemon curd gave it a nice tartness to balance the sweet.  The swiss meringue buttercream was smooth and light, like most Swiss meringue buttercreams, and had a subtle lemon flavor which complemented the cake.  

          The fair results also turned out great.  All three of my entries were awarded a blue ribbon, and my macarons received best in show for teen baking! It was a pleasant surprise, especially since the appearances of the cake and cupcakes were messy.  I guess it's taste that really matters.

           Enjoy!

First, cream together 1 cup of the sugar, butter, and oil for the cake batter.
Sift together the dry ingredients and fold them into the butter mixture in 3 additions, alternating with milk. 
Whip the egg whites to soft peaks, and then beat in 1/3 cup of sugar.
Gently fold the egg whites into the batter.
Distribute the batter into 3 pans and bake until light golden brown and springy. Let cool.
Bring the syrup ingredients to a boil and then let cool.
Trim the top of the cakes off and brush the syrup on top.
Start the buttercream by gently stirring the egg whites, sugar and salt together in a large bowl over a pot of simmering water.  Stir until hot to the touch, or 160*F. 
Remove the bowl from the heat and whip until the mixture becomes a thick, glossy meringue, and the sides of the bowl are no longer warm.
Beat in the butter.
Add the lemon zest, vanilla, and food coloring, if desired. 
Spread some buttercream on top of the cake, and pipe a border around the edge to hold in the curd and raspberries.  
After stacking the layers, give the cake a crumb coat of buttercream and chill for half an hour to make decorating easier.
Frost the cake, pipe a decorative border, and spread some lemon curd on top of the cake.  Top with more raspberries and enjoy.  It tastes best served at room temperature.

Lemon Raspberry Layer Cake

adapted from Flour by Joanne Chang
makes one 9" 3-layer cake

Ingredients

For the cake:
6 tbs unsalted butter, at room temperature
6 tbs canola oil
1-1/3 c. sugar, separated
2 tsp vanilla extract
1 tbs grated lemon zest (from about 2 lemons)
3 c. (360g) cake flour
1 tbs baking powder
1/2 tsp coarse salt
1 c. whole milk, at room temperature
6 egg whites, at room temperature 
For the syrup:
1/2 c.  fresh lemon juice (3-4 lemons)
1/2 c. water
3/4 c. sugar
For the Swiss meringue buttercream:
7 egg whites 
1-1/2 cups sugar
Pinch of salt
2 cups unsalted butter, softened and cut into cubes
1/4 cup lemon curd
1 teaspoon pure vanilla extract
Yellow food coloring (optional)
For assembly:
about 2 cups lemon curd
raspberries

Directions

For the cake:
  1. Place a oven rack in the center of the oven, and preheat the oven to 350*F.  Butter and flour 3 9" cake pans, line with wax paper, and butter and flour the wax paper.  
  2. In a large bowl, cream together the butter, oil, and 1 c. of the sugar, until light and fluffy.  Scrape the sides of the bowl and beat in the vanilla and lemon zest.  
  3. In a medium bowl, sift together the flour, baking powder, and salt.  Add the flour to the butter mixture in 3 additions, alternating with the milk in 2 additions, and stirring until incorporated.
  4. In a large bowl, whip the egg whites to soft peaks (they will hold and then droop).  Add the remaining 1/3 cup of sugar and beat the egg whites for another couple of minutes, until the whites hold their peaks. Gently fold the egg whites into the rest of the batter and divide the batter into the cake pans.  
  5. Bake the cakes for 25-30 minutes, until they are light golden brown and their centers spring back when lightly touched.  Let them cool in their pans for 20 minutes, then turn them out of the pan and wrap in plastic wrap.  Refrigerate for 1/2 an hour, or until completely cool.  
  6. In a small saucepan, combine the ingredients for the syrup.  Bring to a boil over medium heat and then let cool to room temperature.
  7. When the cakes are cool, trim off the tops to even the layers, and brush the tops evenly with the syrup.  
For the buttercream:
  1. Wipe a heatproof bowl with a paper towel and lemon juice, to remove any trace of grease. Add egg whites, sugar and salt, and simmer over a pot of water, whisking gently, until temperature reaches 160°F, or hot to the touch. 
  2. Whip the egg white mixture until it is thick and glossy, and the sides of the bowl feel neutral, not warm. 
  3. With a mixer on low speed, add the butter cubes a few at a time and mix until incorporated. Increase mixer speed to medium and whip the buttercream until it is thick and glossy.
  4. Add the lemon curd and vanilla and beat until well combined. Add food coloring, if desired, and beat to combine.
For assembly:
  1. Spread about 1 cup of buttercream onto a cake layer brushed with syrup.  Pipe a border of buttercream around the edge of the cake.  Spoon and spread about 1/2 a cup of lemon curd on top of the buttercream, and sprinkle a handful of raspberries on top. Place another cake layer on top and repeat.  Place the third cake layer on top.  Frost the cake with a light coat of buttercream, and then refrigerate for 1/2 an hour. 
  2. Frost the cake with more buttercream and pipe a decorative border around the rim.  Spread a thin layer of lemon curd on top of the cake, and garnish with raspberries.  


Monday, August 5, 2013

Cookie Dough Birthday Cake


     My sister is really lucky.  She's going to Duke for college, which means she'll be far away from any family, and she's turning eighteen, which means she can drive and but things on infomercials.  Also, she had her sister make her this birthday cake.
      Jessie isn't 18 yet, but I made her this cake early since she'll be in college on her birthday.  That's why I wrote out "Happy Unbirthday" and put 17 and 3/4 candles on her cake.  My sister was always obsessed with mermaids when she was younger, so I made her into a mermaid figuring on the cake. Since she's going to college, and since Monsters University is really cute, I made half of the cake with that theme.
A picture of my sister for comparison.
        I made a batch of marshmallow fondant a week ahead of time and made the decorations: the Duke and Monsters University logos, Duke chapel and Monsters University building, mermaid and Mike, books, microscope (she's studying biology), flower, and rock.  The way I planned the cake, each side of the cake would have a college logo and building, a character, a book, and a purple border.  I kept the decorations at room temperature so that they wouldn't sweat.
         On the day of the celebration, I covered the cake I made with blue fondant and put it on a cake board covered in green fondant.  Then I put on the purple borders.  I covered the Monsters top side with grey fondant "cobblestones" and the mermaid side with brown sugar "sand."  Next I just added the decorations I made, using a bit of water to "paste" them on. I cut lettering out of the green fondant on the cake board and I stuck candles around the bottom on little balls of fondant.  Then we ate the cake, and it was yummy.

             I made a chocolate chip cake with cookie dough filling and brown sugar swiss meringue buttercream.  Those flavors were perfect for the occasion; they were nostalgic of childhood but still sophisticated.  I made a huge 3 layer 9" cake, since I had a bunch of guests at my house.

             The filling is basically cookie dough, but without the eggs or baking soda, and the cake is just a vanilla cake with chocolate chips tossed in flour thrown in. You can use this cake recipe, or another if you prefer. Making the swiss meringue buttercream is just like making any other one, but you use some brown sugar in place of some white sugar.

              Enjoy!

Cookie Dough Filling

makes enough to fill a 3-layer cake

Ingredients

3/4 cup unsalted butter, at room temperature
1/2 cup white granulated sugar
1/2 cup brown sugar, packed
1/4 cup whole milk or cream
1 tsp vanilla
1/2 cup all-purpose flour
1/2 tsp salt
1/2 cup mini chocolate chips

Directions

Cream the butter and sugars together until light and fluffy.  Add milk and vanilla.  Then stir in flour and salt. Fold in chocolate chips.

Brown Sugar Swiss Meringue Buttercream

makes enough to frost a 3-layer cake

Ingredients

1 lb (4 sticks) unsalted butter, soft but still cool and cut into pieces
5 egg whites
1 cup brown sugar
1/4 cup white granulated sugar
1/2 tsp salt
1 tsp vanilla

Directions

Whisk together the egg whites, sugars, and salt in a heat-proof bowl over simmering water. Whisk until hot to the touch, or 160*F.  Remove the bowl from the heat and beat the egg whites until they are thick and glossy, and the bowl isn't warm to the touch. Add butter a bit at a time and beat until thick. Add vanilla and beat for another minute.


Monday, June 17, 2013

Carrot Cake Cheesecake


          I realized recently that I haven't been eating as many vegetables as I probably should be.  The only meals I regularly have veggies in are lunch and dinner, and even then I mostly eat rice or bread.  But if I want to have my daily 5 servings of vegetables, I'm going to have to extend beyond lunch and dinner.  Zucchini pancakes, vegetable juice, and veggie straws are some solutions, but why limit vegetables to boring, not very flavorful foods?  Why not have veggies for dessert?  Carrot cake is the perfect solution. 


       Carrot cake turns out to be my dad's favorite kind of cake.  It's my go-to cake for celebrating his birthday or father's day.  However, since I don't like making the same thing too many times, I often change the cake up a little.  Like last year, I made him carrot cake sushi (see here) which was basically a carrot roll cake cut to look like sushi (my dad also really likes sushi).  This year, I made a carrot cake cheesecake, which kind of makes average carrot cake seem obsolete.   


         Everyone knows how carrot cake and cream cheese are the perfect food combination.  Carrot cake is always frosted with cream cheese frosting.  But to take it up a notch, this cake covers carrot cake with cheese cake, which is then frosted with cream cheese frosting.  Heavenly.  Forget graham cracker crusts.  Just use cake for the base of all your cheesecakes.  


          I then made some candied walnuts to top the cake.  Since the cheesecake and carrot cake are creamy, the crunch of the walnuts is very welcome.  Also, the big, chunky carrot cakes I'm used to always include walnuts in the batter, but this time I wanted the cake to be smoother so that it would blend with the cheesecake better.  Thus, I just put the nuts on top instead of including them in the batter.  Candying the walnuts gives the nuts an even bigger crunch and a beautiful flavor.  You'll have some extra from the recipe below, but they will probably be nibbled up by the end of the day.  

           Making the cake is simple.  Just keep in mind that you need a 9 to 10" springform pan (a pan with detachable walls).  It doesn't have to be fancy, mine is an old metal one which I bought for a quarter at a yard sale.  

First, whip up the cheesecake batter (cream cheese, eggs, vanilla, sour cream, flour and sugar).
Mix together oil and sugar.
Add eggs and vanilla and mix well.

Stir in the dry ingredients.
And add grated carrots.
Spread half the carrot cake batter on the bottom of a greased 9 or 10" springform pan. 
Dollop some large spoonfuls of cheesecake batter on top (about half the cheesecake batter)
Cover with the spoonfuls of the rest of the carrot cake batter.
Smooth the rest of the cheesecake batter on top.
Bake for about an hour.  It will take less time for a 10" cheesecake to bake.  If it's turning brown after half an hour, cover with aluminum foil.   In the end, it will look puffy and cracked, that's okay. 
Let it cool completely and it will loose it's puffiness.
Whip up the cream cheese frosting. 
Frost the cake and refrigerate until chilled.

Then, make the candied walnuts.  First, toast the nuts in the oven.
Melt some brown sugar.  I used a chopstick to stir.
Add some salt and the walnuts, and toss to coat
Dump the walnuts back onto the parchment paper and quickly break them apart with 2 forks.  Move fast before the sugar hardens.
Remove the cake from the pan and cover with the candied walnuts.  Serve cold.
       Enjoy and remember to eat your veggies!  

       P.S.  This cake is not actually good for you.  

Carrot Cake Cheesecake with Candied Walnuts

recipe adapted from Mel's Kitchen Cafe
makes one 9"-10" cheesecake, serves 12-16 people

Ingredients

For the cheesecake:
1 lb cream cheese 
1/2 cup granulated sugar
2 large eggs
1 tsp flour
1 tsp vanilla extract
1/2 cup sour cream
For the cake:
3/4 cup vegetable or canola oil
1/4 cup packed brown sugar
3/4 cup granulated sugar
2 large eggs
1 tsp vanilla extract
1-1/4 cups all-purpose flour
1/2 tsp baking soda
3/4 tsp cinnamon
1/2 tsp nutmeg
dash of cloves
1/2 tsp salt
1/2 lb finely grated carrots (about 1 heaping cup)
For the cream cheese frosting:
3 oz cream cheese, at room temperature
2 tbs unsalted butter, at room temperature
1-1/2 cups confectioners sugar, sifted
1 tsp vanilla
1 tbs sour cream
For the candied walnuts:
3/4 cups walnuts
1/4 cup brown sugar (loose, not packed)
coarse salt (optional)

Directions


  1. Make the cheesecake batter:  In a medium bowl using an electric mixer on high speed, beat the cream cheese, sugar, eggs and flour until smooth. Add the vanilla and sour cream and mix just until blended. Set aside.
  2. Make the carrot cake batter: In a large bowl using an electric mixer, beat together the oil, brown sugar and granulated sugar until smooth. Add the eggs and vanilla and beat until the mixture is light creamy and light. Stir in the flour, baking soda, cinnamon, nutmeg, cloves and salt until just combined. Mix in the carrots.
  3. Preheat the oven to 350 degrees F. Lightly grease a 9- or 10-inch springform pan with cooking spray. Spread half of the carrot cake batter into the bottom of the prepared pan. Dollop half of the cheesecake batter on top of the carrot cake layer in large spoonfuls. Don't spread or swirl together. Just dollop. Dollop the rest of the carrot cake batter on and around the spoonfuls of cheesecake batter. Spread the last half of the cheesecake batter on top of all the layers and spread with an offset spatula into an even layer. Tap the pan on the counter a couple of times to get rid of any air bubbles.
  4. Bake the cheesecake for 60-70 minutes (check earlier if using a 10-inch springform pan; it won't bake as long as a 9-inch pan).  Cover the top of the cheesecake with foil the last 20 -30 minutes of baking if it is browning too quickly. The cheesecake will puff up and probably crack, but once it cools it will deflate and the cracks will be covered with frosting.  The top center part of the cheesecake should still be slightly soft and jiggly when you take it out, and be careful not to over-bake. Let cool completely in the pan on a wire rack for about an hour.
  5. Make the frosting: Whip together the cream cheese and butter until creamy and smooth. Mix in the powdered sugar a little at a time until the frosting is well-combined with no lumps. Add the vanilla and sour cream and mix well.  When the cheesecake is cool, spread the frosting evenly over the top of the cheesecake.
  6. Make the candied walnuts:  Preheat oven to 350*F.  Line a baking sheet with parchment paper and spread the walnuts on top.  Bake for 5 minutes, or until toasted and fragrant.  Be careful not to burn them.  Meanwhile, place the sugar in a heavy-bottomed pot over medium heat.  Stir constantly until melted, then add a pinch of salt and the toasted walnuts. Toss to coat.  Scoop the walnuts back onto the parchment lined baking sheet and immediately separate the walnuts using 2 forks.  Set aside to cool completely before placing on top of the cheesecake.  
  7.  Cover the cheesecake with tin foil or plastic wrap, careful not to touch the frosting, and refrigerate until well chilled, at least 6 hours. Serve cold. The cheesecake can be refrigerated for 2 days.