Sunday, April 28, 2013

Chocolate Covered Strawberry Pop-Tarts From Scratch


I really like of Pop-Tarts, so when I saw a recipe for making them from scratch, I knew I had to try.

I used a basic pastry dough recipe from Flour by Joanne Chang, and then put homemade strawberry balsamic jam between two rectangles of it.  I then baked it and coated the pastries with chocolate glaze and sprinkles.

It wasn't really a Pop-tart, but it was delicious.  They reminded me of flakier, butterier versions of the Pillsbury Toaster Strudel.  But of course, these were much better than those treats you get from the freezer.  

These do require a little time and effort to make.  You have to refrigerate the dough for at least four hours before using it, and I suggest that if you have  warm kitchen, you should return the dough to the refrigerator a couple of times while you're cutting out rectangles.  Otherwise, the butter will melt and it'll be much harder to make  a good looking toaster pastry.

You can use store-bought jam, but I decided to make my own jam from fresh strawberries and balsamic vinegar.  The vinegar really brings out the sweetness from the strawberries.

The result has a texture and flavor similar to that of a croissant, only it's not as soft on the inside. I also love the strawberry filling combined with the chocolatey glaze.  I'm definitely going to make these again.  You can mix it up and use any fillings and glazes you want.

Enjoy!

To make the jam: cook the strawberries with the sugar and vinegar.
It's ready when it looks like this.
Here's the cooled jam, ready to use.
I stored my jam in a Smucker's strawberry jam jar.  (Very resourceful, I know)
To make the dough, mix cold butter pieces with the dry ingredients until incorporated. 
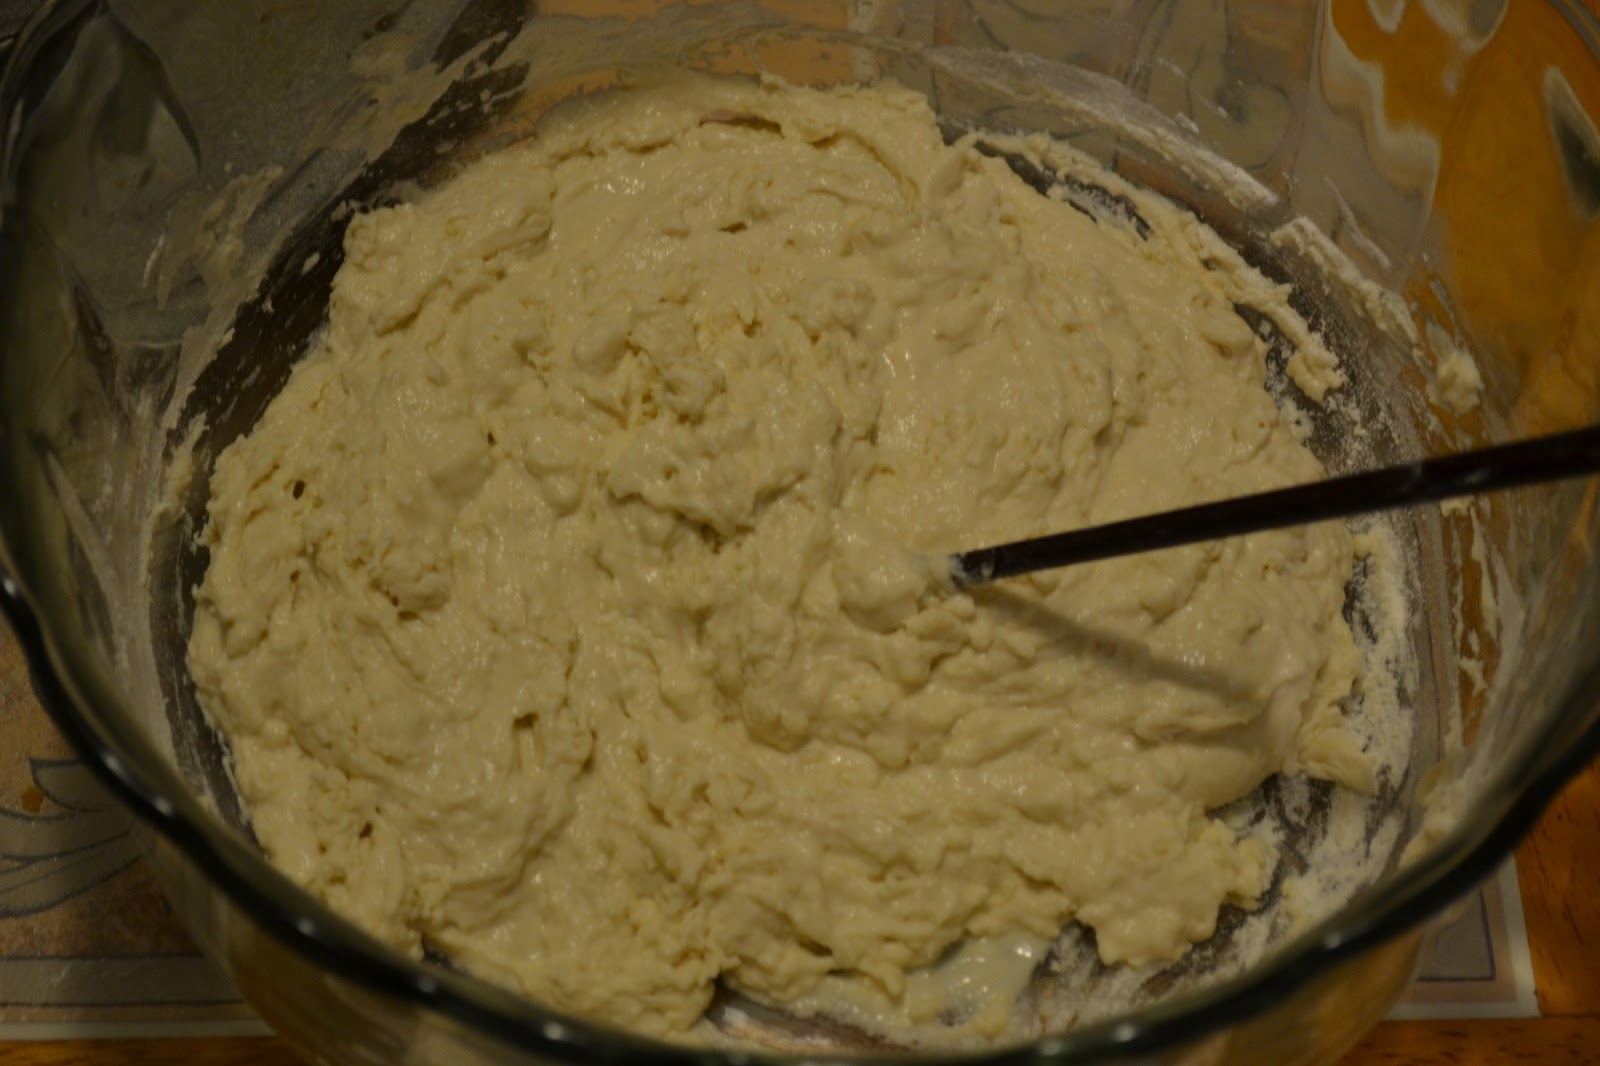
Then stir in egg yolks and milk until it forms a shaggy dough.
Place the dough on an unfloured surface.  Form a tight mound.
Starting from the top of the mound, slide your palm down the mound, flattening the dough.  Repeat for all sides., until you have a flat dough with smears of butter. 
Gather up the dough, cover in plastic wrap, press into a disk , and refrigerate for at least 4 hours or up to a couple of days.
Divide the dough in half and roll each half into a rectangle.

Score one rectangle into 8 smaller rectangles and brush this with egg.

Put on some jam.

Place the other sheet of dough on top, cut into 8 rectangles, then bake.


Let the pastries cool.


Whisk together the glaze.


Pour the glaze on the pastries, put on some sprinkles, let the glaze set, and enjoy!

Chocolate Covered Strawberry Pop-Tarts

makes 8 large pastries
adapted from Flour by Joanne Chang

Ingredients

For the Pastry Dough:
1-3/4 cups (245g) all-purpose flour
1 tbs sugar
1 tsp coarse salt
1 cup (2 sticks/288g) cold unsalted butter, cut into 12 pieces
2 egg yolks
3 tbs cold milk

For the Filling:
Strawberry balsamic jam (recipe below) or other strawberry jam

For the Glaze:
1/2 cup confectioners sugar
1/4 cup water
1 oz bittersweet chocolate, melted and cooled

To Finish:
1 egg, beaten
sprinkles (optional)

Directions

  1. Make the pastry dough: In a large bowl, whisk together the flour, sugar, and salt.  Mix in the cold butter pieces until the flour is clumpy and there are pecan-sized pieces of butter visible.  Whisk together the egg yolks and milk in a separate bowl, and then add to the flour mixture.  Mix for a few seconds until incorporated and the dough looks shaggy.  On an unfloured surface, form the dough into a tight mound.  Starting from the top, slide your palm down the sides, pressing the dough flat until the butter is smeared and the dough comes together.  Gather the dough into a ball, then wrap in plastic wrap and press into a disk 1" thick.  Refrigerate for at least 4 hours.
  2. Split the pastry dough in half.  Keeping the other half refrigerated, place on half on a floured surface. Place a sheet of plastic wrap on top and roll the dough into a 14" by 11" rectangle.  Return this half to the refrigerator and roll out the other half of the dough to the same dimensions.  With a knife, score one sheet of dough into 8 smaller 3-1/2" x 5-1/2" rectangles.  Brush this dough with beaten egg and place 2 tbs of jam into the center of each small rectangle.  Carefully place the other sheet of dough on top and lightly pres down.  Cut the dough into 8 rectangles, following the score marks you made.  
  3. Place each rectangle on a parchment lined baking sheet and bake at 350*F for 30-40 minutes, until the pastries are light golden brown.  Let cool for half an hour.  
  4. Make the glaze: whisk all the the ingredients for the glaze together in a small bowl until smooth and pourable.
  5. Pour the glaze on each cooled pastry and then sprinkle the pastries with sprinkles, if desired.  Allow the glaze to set for 10-15 minutes.  
  6. Store pastries in an airtight container at room temperature for up to 2 days. 

Strawberry Balsamic Jam 

recipe adapted from Savory Sweet Life

Ingredients

2 cups chopped strawberries
1 cup sugar
2 tbs balsamic vinegar

Directions


  1. Add the chopped strawberries, sugar, and balsamic vinegar to a large pot. Simmer until strawberries are tender, about 20 minutes, stirring occasionally. 
  2. If you have an immersion blender, puree strawberries right in the pot until slightly smooth but still slightly chunky. If you don’t have an immersion blender, transfer the mixture to a food processor or blender and pulse until desired consistency, then add the mixture back to the pot.
  3. Bring the mixture to a gentle boil, and cook for 30 minutes, allowing the mixture to thicken. Stir frequently to ensure the mixture doesn’t burn on the bottom of the pot. It's ready when it's thick enough that when you stir, you can see the bottom of the pot.  


Tuesday, April 23, 2013

Fresh Blueberry Bagels


     I told you earlier that I was going to make something else with fresh blueberries.  Remember?  I bet you weren't expecting blueberry bagels, were you?

     Anyways, bagels hold a special place in my heart.  I'm pretty much in love with all things bread, just to let you know.   But nothing can beat a fresh bagel.  Nothing.    


     The problem is that often times, the bagels you buy from the store aren't always fresh.  And sometimes they run out of your favorite type of bagel.  But what I told you that you can make your own bagels at home that are actually better than store-bought ones?  And that they require only a little effort to make?  Then all your troubles would be solved and you'll be able to reach fresh-bagel-heaven whenever you  want.  

     Now these bagels are something special.  They are the best blueberry bagels I have ever had.  They have a crisp bottom crust, chewy inside, and, of course, fresh blueberries.  I can never taste the blueberries in the bagels I buy from the grocery store, but here in this bagel, there's that perfect bite of blueberry which stuns your taste buds with its amazingness. That is how blueberry bagels are supposed to taste.  

     They were so worth staying up past midnight to make.


     That's right, I spent my night making bagels.  But don't worry, it's just because I didn't start them until around 9 in the evening.  And all I had to do for most of the time was wait for the dough to rise (while doing homework.)  If you're good at planning things ahead of time, you can make the dough up to two days beforehand and refrigerate it. Then you just have to give the bagels a quick boil, and  bake them for ten minutes. 

     If you're not familiar with the bagel making process, don't fear.  It's quite simple. 

     One or two days before you plan to bake them, start by making a sponge.  Stir together some yeast, water, and bread flour.  It's best to use instant yeast, but if you only have active dry yeast (like me), then just be sure to activate the yeast before you add it anywhere.  Let it sit in a couple of tablespoons of warm water with a pinch of sugar for five minutes.  


     After two hours of letting the sponge rise, add more flour, honey, salt, sugar, cinnamon, and more yeast. Stir it to form a ball, and then knead the dough until it passes the windowpane test.  In this test, you basically just stretch a ball of dough into a square.  If it doesn't rip, it means that the gluten's developed nicely and you can move on to the next step.


     Divide the dough into pieces.  I suggest using a scale for this.  I made 12 mini bagels, and each dough piece weighed about 2.7 oz.  You can make the bagels any size you want to.  Then, take 3-4 blueberries (double this for larger bagels) and stick them a ball of dough, rolling the dough ball to incorporate them. Repeat for the rest of the dough balls.  Don't worry if you crush some
berries.  Cover the balls with a damp towel and let them rest for 20 minutes.


     Now you shape the bagels.  My favorite way to do this is by taking a ball of dough, poking your thump in the middle to make a hole, and then widening the whole with your fingers to make a ring shape.  Make sure that the sides are evenly shapes, so you don't have any parts that are too thin or too thick.  Line a baking sheet with parchment paper, and then lightly spray it.  Place the shaped bagels 1 inch apart (2 inches for larger bagels) on the baking sheet and lightly cover with plastic wrap.  You should spray the plastic wrap as well, to prevent it from sticking to the bagels.  Let the bagels sit for about half an hour.  Then transfer the baking sheet to the refrigerator and keep it there overnight, or up to 2 days.  


     On the day you want to make the bagels, bring a wide pot of water to a boil.  Add some baking soda and brown sugar (to make the crust chewy and flavorful).  When the water is boiling, drop in a few bagels, as much as can comfortably fit. They should float within ten seconds, and you can help them float by lifting them with a spatula.  Boil them for 1 minute, then flip them over and boil them for another minute.  (If you want chewier bagels, go for 2 minutes per side.)  With a spatula, transfer the bagels to a wire rack to drain.  Repeat with the rest of the dough.  


     Sprinkle the same baking sheet with parchment paper with semolina flour or cornmeal.  Space the bagel dough rings one inch apart (two inches for larger bagels) on the baking sheet.  Bake at 500*F for five minutes.  Then turn the pan around 180 degrees, and lower the oven temperature to 450*F.  Bake for another 5-6 minutes, or until the bagels are light golden brown all over.  Transfer to a wire rack and let cool for about 15 minutes before serving.  


     And there you go, fresh bagels!  I ate them plain, but you can also slice them and spread some butter, honey, cream cheese, or nutella on top.  

     This may seem like a lot of work, but most of the time you just wait for the dough rise.  Also, the process gets easier with experience.  And it's totally worth it, trust me!

      Enjoy!

Fresh Blueberry Bagels

makes 12 mini, 8 regular, or 6 large bagels
adapted from The Bread Baker's Apprentice by Peter Reinhart (which is a very good book, by the way)

Ingredients

(**A note on the ingredients:  I used what I had on hand (bread flour and honey) and the results were wonderful.  If you want really high-class, bakery-like bagels, you can put in the effort of finding high gluten flour (instead of bread flour) and barley malt syrup/ powder (use 1-1/2 tsp tbs malt syrup or 1 tsp malt powder instead of honey).  Also, if you use bread flour, I would suggest adding a tablespoon of vital wheat gluten, which you can find in the baking aisle to improve the texture of the bagel a bit.  1-1/2 tsp brown sugar can also be used in place of the honey.**)

For the sponge:
1/2 tsp instant or active dry yeast (activate any active dry yeast in warm water with sugar before using)
2 cups bread flour
1-1/4 cups room temperature water

For the rest of the dough:
1/2 tsp instant or active dry yeast
1-3/4 to 2 cups bread flour
1-3/8 tsp salt
1 tbs ground cinnamon
2 tbs granulated sugar
1-1/2 tsp honey
1/3 cup fresh blueberries

For Boiling:
1 tbs baking soda
1 heaping tbs brown sugar

Directions

  1. Make the sponge. One or two days before you are planning to bake the bagels, stir together the yeast, flour, and water for the sponge. Let sit at room temperature for 2 hours.  It should be bubbly.
  2. Make the dough. Add the yeast, 1-1/2 cups of the flour, salt, cinnamon, sugar, and honey to the sponge.  Stir to form a dough.  Slowly add the rest of the flour to make a firm dough.  Transfer to a floured surface and knead for about 10 minutes, until smooth and stiff, but still soft.  It should pass the windowpane test which means that you can stretch a ball of it into a translucent square without the dough breaking.  Add more flour if necessary.  Then, divide the dough into equally sized pieces and roll a few blueberries into each dough ball until incorporated.  Don't worry if some berries burst. Cover dough with a damp towel and let rest for 20 minutes.
  3. Shape the dough.  Line a baking sheet with parchment paper and spray it with cooking spray. Take a ball of dough and poke your thumb into the center.  Widen the hole with your fingers while forming a nice, even ring shape.  Place the rings 1-2" apart on the baking sheet.  Spray a piece of plastic wrap with cooking spray and lightly cover the dough.  Let rest for 20 minutes at room temperature, then transfer to the refrigerator.  Refrigerate overnight, or up to 2 days.
  4. Boil the bagel dough.  Preheat oven to 500*F (for next step.) Bring a large, wide pot of water to a boil.  Stir in the baking soda and brown sugar.  Gently lower some bagels into the water, as many as can fit comfortably.  They should float on the surface, and you can help them float by lifting them with a spatula.  Boil each dough piece for one minute, then flip over and boil for another minute. (You can also boil them for 2 minutes per side if you want a chewier bagel).  Lift the bagels from the water with a spatula and transfer to a wire rack.  Repeat with remaining dough.
  5. Bake the bagels. Sprinkle the parchment lined baking sheet with cornmeal or semolina flour. Place the bagel dough 1-2" apart (2 inches for larger bagels).  Bake in preheated oven on the middle rack for 5 minutes.  Rotate the baking sheet 180 degrees and lower the oven temperature to 450*F.  Bake bagels for another 5-6 minutes, until golden brown all over.  Transfer bagels to a cooling rack to cool for 15 minutes before serving.
  6. Enjoy.


Sunday, April 21, 2013

Mini Blueberry Lemon Pies


    Here's how my thought process goes:

    "It's so nice outside; it reminds me of summer.  Lemon bars are perfect for this type of weather.  Lemon goes really well with blueberries, too.  Lemon and blueberry bars?  Not crazy enough.  I remember I was going to make these cherry pie bars at one point....Maybe I can make pie bars.  Or, even better, miniature pies! "

     Yeah, it's pretty logical.


     I might be going crazy over miniature desserts.


     The only pie I ever made myself before was key lime pie with graham cracker crust, and I've never made an actual pie crust before.  My mom makes apple pie sometimes, but she always uses store-bought pie crust.      Only until now do I realize how easy making pie crust really is.  You can even make it in a food processor if you have one.
First, whisk together the dry ingredients. (Or combine in a food processor.)

Add a mound of small, cold butter pieces.  I shredded mine.

Cut the butter into the flour until the mixture is coarse and crumbly.  Or pulse in a food processor (don't over  pulse it). 
Stir in the milk and whisked egg yolk.
Form the dough into a rough ball, then flatten it into a disk and refrigerate for at least half an hour.  Don't overwork the  dough. While the dough is being chilled, you can make the filling (skip down the page some).
     The crust recipe I used isn't the average, flaky pie crust.  It has confectioner's sugar in it to sweeten it, and baking powder to give it lift.  It's more malleable than other pie crusts, which makes shaping it much easier.  It's buttery like normal pie crust, and the sweetness balanced the lemon in the filling. Just so you know, you could use store bought pie crust to save some time and effort.

Place about half of the dough on plastic wrap or wax paper, and then cover it with more plastic wrap/ wax paper.  Roll it out to about and 1/8" thickness.  
Cut out 2-1/2" circles to fit a mini-muffin pan.
Carefully press the circles into the cups of a mini-muffin pan.

     One thing you have to do with the crust in this recipe is blind bake it.  That means baking the bottom crust  without the filling in the oven for a few minutes to firm it up a bit.  This makes sure the filling doesn't interfere with the crust and doesn't get overcooked.  To do this with the mini pies, just cut out small squares of parchment and place them over each pie crust cup.  Fill the cup with dry beans or pie weights and bake at 325*F for five minutes, until the crust looks dry but is still pale.  Then, just spoon out the beans and remove the paper.
Blind bake the crust.  You can save the beans and use them again later.
Her'es the crust after being blind baked.


     The filling has the tartness of a lemon bar and the sweetness of the blueberries. It's a really refreshing flavor.  To make the filling, I just made some lemon curd and mixed it with blueberries.  The lemon curd recipe I used actually comes from a lemon meringue pie recipe.

Whisk together the lemon juice, sugar, corn starch, and egg yolks until  it comes to a boil.
Boil for one minute, whisking constantly.
Strain the curd into a bowl.  Stir in butter until melted and add the lemon zest.
Stir in blueberries. Refrigerate until cold. 
     Now's the fun part.
Fill the mini crust with the filling.
Cut out a circle of dough the same size as the bottom crust you made.
Wrinkle the edges by pressing the ridge between two fingers. 
Cut out a shape in the middle. I cut out some flowers and I put those over other pies.
Press over the filling.
To make a lattice crust, cut out thin strips of dough.
Place over the filling in a lattice pattern.  Then, you can brush the  crusts with some egg wash and sprinkle on some coarse sugar.
Now just bake for about 10 minutes, until the blueberries are bubbling and the crust is light brown.
     Blueberries are starting to come in season, so prepare yourself.  I can see another fresh blueberry recipe in the near future.  Enjoy!

Mini Blueberry Lemon Pies

makes 12 mini pies
crust and lemon curd adapted from Desserts from the Famous Loveless Cafe by Alisa Huntsman

Ingredients

For the Crust:
1 cup all-purpose flour
1/4 cup confectioner's sugar
1 tsp baking powder
3/4 cup (6tbs) cold butter, cut into small pieces or shredded
1 egg yolk, beaten
1 tbs cold milk

For the Filling:
1/2 cup sugar
1-1/2 tbs cornstarch
1/2 cup lemon juice (preferably fresh, from about 3 lemons.)
3 egg yolks
1 tbs unsalted butter, softened
1 tsp grated lemon zest
1/2 cup blueberries

To Finish
1 tbs egg white+ 1 tsp water
coarse sugar, for sprinkling

Directions

  1. Make the pie crust dough.  Combine the flour, confectioners sugar, and baking powder in a large bowl or food processor.  Add the butter and mix/ pulse until the mixture is coarse and crumbly.  Stir in the egg yolk and milk.  Divide the dough in half and form each half into a rough ball, careful not to handle it too much.  Flatten the dough, cover in plastic wrap and refrigerate for at least 30 minutes.
  2. Make the filling.  In a small saucepan, whisk together the sugar and cornstarch, then slowly stir in the lemon juice.  Whisk in the egg yolks. Put the saucepan over medium heat and, whisking the mixture constantly, bring it to a slow boil.  Reduce the heat to low and cook for one minute.  Remove from the heat and strain the curd into a glass bowl. Stir in 1 tbs butter until melted and then stir in the lemon zest.  Then stir in blueberries.  Place a sheet of plastic wrap over the bowl, pressing it onto the surface of the lemon curd.  Refrigerate until cold, about half an hour.  
  3. Blind bake the pie crust. Preheat oven to 325*F. Take one ball of dough out of the refrigerator and place it on top of plastic wrap.  Cover the dough with another piece of plastic wrap or wax paper and roll the dough to an 1/8" thickness.  Cut out twelve 2-1/2" circles.  Carefully press these into a mini muffin pan lightly sprayed with cooking spray.  Cut out 12 small squares of parchment paper and press these into each dough cup.  Fill with dry beans or pie weights (this prevent the dough from expanding too much).  Bake in preheated oven for 5 minutes or until dry but still pale. Let crusts cool in pan completely.
  4. Make the pies.  Preheat oven to 350*F.  Fill the crusts with the lemon blueberry filling.  Roll out the rest of the pie dough the same way you did before.  To make a double-crust pie, cut out another 2-1/2" circle, ruffle the edges, and cut a shape out from the middle; press onto pie filling. To make a lattice, cut out strips of dough and layer on top of the pie in a lattice pattern.  Brush these top crusts with the egg wash and sprinkle with coarse sugar.  Bake for 10-12 minutes until the blueberries are bubbling and the crusts are light brown.  Let cool completely in pans, then serve.