Thursday, August 22, 2013

Dulce de Leche Stuffed Mexican Chocolate Cookies


       I'm in the process of coming up with some recipes for a themed bake sale I'm holding at school.  The particular theme I'm working on is "ancient civilizations," which is pretty hard since ancient people basically ate some type of meat and grain, and that was it.  Anyways, I came up with these cookies to represent the ancient Incas, since they lived in what is now Mexico and (fortunately) had access to cocoa beans.  


       This is a thick, dark chocolate cookie with a dash of cinnamon, filled and stuffed with dulce de leche. The good thing about stuffing the cookies with dulce de leche is that the filling never hardens and always remains gooey.  Other caramel-stuffed cookies have to be eaten warm.  Also, these cookies are big, about the size of the palm of your hand, so they are perfect for selling.  

        Dulce de leche is a common Mexican ingredient, which is like carmelized milk.  You can buy it at a grocery store, or you can make it by yourself out of sweetened condensed milk.  Since I had a can of sweetened condensed milk already sitting in my pantry, and curiosity, I decided to go with the latter option. 


         There are lots of ways to make dulce de leche (just google it).  I chose the oven method.  All you need is a roasting pan, hot water, a glass dish that fits in the roasting pan, an oven, and a can of sweetened condensed milk.  
Place one can of sweetened condensed milk in a glass dish. I used a pie plate.
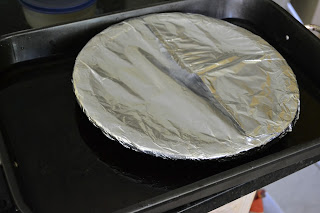
Cover the dish tightly with foil.
Place the dish in the roasting pan.  Pour hot water into the pan until it reaches halfway up the sides of the glass dish. Remove the dish from the roasting pan, and place the roasting pan on the bottom rack of the oven.  Preheat the oven to 425*F. 
When the oven is heated, place the glass dish back into the roasting pan.  Bake for 1 hr and 15 minutes.  Check the water level in the pan every half hour and add water if necessary.  Take the glass dish out of the oven and let cool for at least  hour. 
Remove the foil.  You should have a deep brown caramel. 
Stir the dulce de leche in a bowl until smooth and refrigerate until completely cool.  
     Making the cookies is very simple.  To start, you make a simple chocolate cookie dough.  It will be very thick.
Make the chocolate cookie dough.
Make a cinnamon-sugar mixture out of 3 tbs granulated sugar, 1 tsp cocoa powder, and 2 tsp cinnamon.

Scoop rounds of tbs of cookie dough onto a parchment-lined baking sheet,  1-1/2 inches apart.  Then scoop about 1 tsp of  dulce de leche on top.

Scoop another 2 tbs of chocolate cookie dough on top of the dulce de leche.  Pinch the dough into a ball to enclose the dulce de leche.  Roll it in the cinnamon sugar and place back on the baking sheet.  Press the dough down to a make a disk about 3/4" in diameter. 
 Bake at 350*F for 16-20 minutes.  Let cool.
Pipe more dulce de leche on top. 
       I was excited to make these cookies and I'm happy with how they turned out.  I already had all the ingredients at home, so I didn't have to wait for anyone to take me to the grocery store (which I hate doing; once I have a recipe in my mind, it's all I can think about until I actually make it).  The cinnamon and dulce de leche really add flair to the rich but ordinary chocolate cookies.

        If you want a spicier Mexican chocolate cookie, try adding 1/4 tsp chili powder to add warmth.

      Enjoy!

Dulce de Leche Stuffed Mexican Chocolate Cookies

makes 12 large cookies
adapted from My Baking Additction

Ingredients

For the Cookie Dough:
2 sticks cold and cubed unsalted butter
1 cup granulated sugar
1/4 cup light or dark brown sugar
2 eggs
1/2 cup good quality dark cocoa powder (like Hershey's Special Dark)
2 1/4 cups all-purpose flour
1/2 tsp coarse salt
1 teaspoon baking powder
1 tsp ground cinnamon
For Finishing:
about 1 cup dulce de leche (see above for instructions for homemade)
3 tbs granulated sugar
2 tsp ground cinnamon
1 tsp cocoa powder

Directions

  1. Preheat oven to 350*F.  Line 2 baking sheets with parchment paper or silicon baking mats.
  2. In a large bowl, cream together the butter and sugars until well-combined. Then beat in the eggs, one at a time.  Mix in the cocoa powder well.  
  3. Whisk together the flour, salt, baking powder, and cinnamon in a medium bowl, and then fold into the wet ingredients until combined.  
  4. Scoop 2 tbs of dough onto the cookie sheets, 1-1/2 inches apart.  Scoop 1 tsp of dulce de leche on top of the dough, and then scoop another 2 tbs of dough on top.  
  5. Pinch the dough around the dulce de leche filling to form a ball.
  6. In a small bowl, whisk together the sugar, cinnamon, and cocoa powder for finishing.  Roll the balls of cookie dough in the sugar mixture and place back on the cookie sheets.  Press the dough balls into 3/4" thick disks.  
  7. Bake the cookies in the preheated oven for 16-20 minutes.  Let cool on the pans for 5-10 minutes, then transfer to a cooling rack to cool completely.
  8. Fill a piping bag with dulce de leche and pipe onto the cooled cookies in any pattern you wish.  Store the cookies at room temperature in a sealed container.  


Thursday, August 15, 2013

Lemon Raspberry Layer Cake

     The third and final thing I baked for the fair was this lemon-raspberry cake. It's a good thing I took pictures because the frosting was messed up once I got to the fair.
        I only had to submit half of the cake, so my family and I got to eat the other half.  I also got to take a picture of the inside layers of the cake before I actually sliced it.  You can see the raspberries dotting the inside of the cake.

       The cake is a lemon sponge cake that has been moistened with a lemon syrup, and it is filled and frosted with lemon curd Swiss meringue buttercream.  There is also lemon curd and raspberries spread between the layers.  I used store-bought lemon curd since I was short on time (I had one day to bake 3 entries).  Plus, the lemon curds I have made in the past all had this sort of metallic taste, maybe because of the pan I used.  I had frozen raspberries in my freezer which I thawed to put on the cake, but fresh raspberries probably would have held their shape better.  

         The cake was fluffy and moist and the raspberries and lemon curd gave it a nice tartness to balance the sweet.  The swiss meringue buttercream was smooth and light, like most Swiss meringue buttercreams, and had a subtle lemon flavor which complemented the cake.  

          The fair results also turned out great.  All three of my entries were awarded a blue ribbon, and my macarons received best in show for teen baking! It was a pleasant surprise, especially since the appearances of the cake and cupcakes were messy.  I guess it's taste that really matters.

           Enjoy!

First, cream together 1 cup of the sugar, butter, and oil for the cake batter.
Sift together the dry ingredients and fold them into the butter mixture in 3 additions, alternating with milk. 
Whip the egg whites to soft peaks, and then beat in 1/3 cup of sugar.
Gently fold the egg whites into the batter.
Distribute the batter into 3 pans and bake until light golden brown and springy. Let cool.
Bring the syrup ingredients to a boil and then let cool.
Trim the top of the cakes off and brush the syrup on top.
Start the buttercream by gently stirring the egg whites, sugar and salt together in a large bowl over a pot of simmering water.  Stir until hot to the touch, or 160*F. 
Remove the bowl from the heat and whip until the mixture becomes a thick, glossy meringue, and the sides of the bowl are no longer warm.
Beat in the butter.
Add the lemon zest, vanilla, and food coloring, if desired. 
Spread some buttercream on top of the cake, and pipe a border around the edge to hold in the curd and raspberries.  
After stacking the layers, give the cake a crumb coat of buttercream and chill for half an hour to make decorating easier.
Frost the cake, pipe a decorative border, and spread some lemon curd on top of the cake.  Top with more raspberries and enjoy.  It tastes best served at room temperature.

Lemon Raspberry Layer Cake

adapted from Flour by Joanne Chang
makes one 9" 3-layer cake

Ingredients

For the cake:
6 tbs unsalted butter, at room temperature
6 tbs canola oil
1-1/3 c. sugar, separated
2 tsp vanilla extract
1 tbs grated lemon zest (from about 2 lemons)
3 c. (360g) cake flour
1 tbs baking powder
1/2 tsp coarse salt
1 c. whole milk, at room temperature
6 egg whites, at room temperature 
For the syrup:
1/2 c.  fresh lemon juice (3-4 lemons)
1/2 c. water
3/4 c. sugar
For the Swiss meringue buttercream:
7 egg whites 
1-1/2 cups sugar
Pinch of salt
2 cups unsalted butter, softened and cut into cubes
1/4 cup lemon curd
1 teaspoon pure vanilla extract
Yellow food coloring (optional)
For assembly:
about 2 cups lemon curd
raspberries

Directions

For the cake:
  1. Place a oven rack in the center of the oven, and preheat the oven to 350*F.  Butter and flour 3 9" cake pans, line with wax paper, and butter and flour the wax paper.  
  2. In a large bowl, cream together the butter, oil, and 1 c. of the sugar, until light and fluffy.  Scrape the sides of the bowl and beat in the vanilla and lemon zest.  
  3. In a medium bowl, sift together the flour, baking powder, and salt.  Add the flour to the butter mixture in 3 additions, alternating with the milk in 2 additions, and stirring until incorporated.
  4. In a large bowl, whip the egg whites to soft peaks (they will hold and then droop).  Add the remaining 1/3 cup of sugar and beat the egg whites for another couple of minutes, until the whites hold their peaks. Gently fold the egg whites into the rest of the batter and divide the batter into the cake pans.  
  5. Bake the cakes for 25-30 minutes, until they are light golden brown and their centers spring back when lightly touched.  Let them cool in their pans for 20 minutes, then turn them out of the pan and wrap in plastic wrap.  Refrigerate for 1/2 an hour, or until completely cool.  
  6. In a small saucepan, combine the ingredients for the syrup.  Bring to a boil over medium heat and then let cool to room temperature.
  7. When the cakes are cool, trim off the tops to even the layers, and brush the tops evenly with the syrup.  
For the buttercream:
  1. Wipe a heatproof bowl with a paper towel and lemon juice, to remove any trace of grease. Add egg whites, sugar and salt, and simmer over a pot of water, whisking gently, until temperature reaches 160°F, or hot to the touch. 
  2. Whip the egg white mixture until it is thick and glossy, and the sides of the bowl feel neutral, not warm. 
  3. With a mixer on low speed, add the butter cubes a few at a time and mix until incorporated. Increase mixer speed to medium and whip the buttercream until it is thick and glossy.
  4. Add the lemon curd and vanilla and beat until well combined. Add food coloring, if desired, and beat to combine.
For assembly:
  1. Spread about 1 cup of buttercream onto a cake layer brushed with syrup.  Pipe a border of buttercream around the edge of the cake.  Spoon and spread about 1/2 a cup of lemon curd on top of the buttercream, and sprinkle a handful of raspberries on top. Place another cake layer on top and repeat.  Place the third cake layer on top.  Frost the cake with a light coat of buttercream, and then refrigerate for 1/2 an hour. 
  2. Frost the cake with more buttercream and pipe a decorative border around the rim.  Spread a thin layer of lemon curd on top of the cake, and garnish with raspberries.  


Sunday, August 11, 2013

Vanilla Macarons with Peach Buttercream

           Macarons could be my next favorite baking trend.  They may not be as reliable as my cupcakes, or as easy to make.  In my mind, they had always been in a higher, "fancier" class of desserts, and could only be made on very special occasions. After making the French cookies a few times, though, I have realized that the process can be quite simple, and the result is just as versatile and crowd-pleasing as cupcakes. Macarons even have the same hand-held dessert appeal as the famous, ubiquitous cupcake.

            I entered these macarons in my county's annual fair for the "miscellaneous cookies" category.  The macaron has a simple, vanilla bean shell which I left white.  Then, I made a buttercream with puree from peaches that my family had just picked that day.  To assemble, pipe a bit of jam onto one cookie, pipe a buttercream border around that, and then place another macaron shell on top.  It's recommended that you wait at least 24 hours before eating the macaron to give the flavors time to mature.

             The process is the same for most macaroons:  sift together dry ingredients, beat egg whites with sugar, fold in the dry ingredients, pipe into circles, let rest, and bake.  Once you get a feel for it, it isn't hard at all.  Just remember to make accurate measurements and to follow directions with precision.

Sift together almond flour (or ground almonds) and powdered sugar. 
Place egg whites in a bowl with the granulated sugar and vanilla bean seeds. 
Beat to soft peaks (don't over-beat)
Fold in dry ingredients until they are well-incorporated and the batter flows like lava (don't over-mix or under-mix)
Pipe batter onto a clean sheet of parchement paper or a silicon baking mat. Tap the pan a few times on the counter to eliminate air bubbles.
Wait 30 minutes to 1 hour for a soft "shell" to form on the surface of the macaron.  It will take the longer amount of time if your kitchen is humid.  
Bake in a 300*F oven for 10-12 minutes, and then let cool.  
To make the buttercream, puree some peach slices in a blender.  
Whip up a mixture of butter, confectioners sugar, vanilla, and salt, and then beat in the peach puree.
Pipe the buttercream and jam onto one macaron shell, and then place the other shell on top.  
                    Next time you make dessert for a special event, why not try macarons?  

                    Enjoy!

Vanilla Macarons with Peach Buttercream

makes 6-8 large macarons
adapted from Annie's Eats

Ingredients

For the macaron shell:
110 grams almond flour (or blanched almonds ground in a food processor)
200 grams confectioners sugar
100 grams egg whites, at room temperature
1 vanilla bean, split open
50 grams granulated sugar
For the peach buttercream:
¾ cup butter, at room temperature
1 ½ cups confectioner’s sugar
pinch of salt

1/4 tsp vanilla extract
¼ cup peach puree

apricot or peach jam (optional)

Directions

  1. Sift together the almond flour and confectioner's sugar in a medium bowl.
  2. Place egg whites in a large bowl and whisk until foamy.  Add seeds from the vanilla beans and granulated sugar.  Beat on high speed until you have a glossy meringue that holds soft peaks. 
  3. Fold the dry ingredients into the egg whites until they are thoroughly incorporated and the batter flows like lava.  Place the batter into a piping bag fitted with a large round tip. 
  4. Line 2 baking sheets with clean parchment paper or silicon mats. Pipe the batter into 1-1/2" rounds. Tap the baking sheets on the counter a few times to eliminate air bubbles.  Let sit for 30 minutes to 1 hour, until the surface of the batter is slightly dry. 
  5. Heat oven to 300. Bake one sheet of macarons for 10-12 minutes. Repeat with the other pan.  Let shells cool completely. 
  6. Make the buttercream: Beat together the butter and sugar until light and fluffy, and then beat in the vanilla and salt.  Beat in the peach puree until the frosting is thick.  
  7. If desired, pipe a small amount of jam onto the flat side of one macaron shell.  Then pipe a border of buttercream around the jam and place another macaron shell on top.  Repeat for the rest of the macaron shells. 
            

Thursday, August 8, 2013

S'mores Cupcakes


       There's something about cupcakes that always makes me happy.  Maybe it's the cloud of frosting on top, or the fact that you don't have to slice it like a cake or pie; with cupcakes, everyone gets their own beautifully decorated dessert.  Or maybe it's the endless possibilities for the combination of cake, filling, frosting, and toppings.


         As you may tell, cupcakes are at the top of my list of favorite things to bake.  So when I decided to enter some baked goods into my county's fair, I was definitely going to bring some awesome cupcakes to the competition.  

         With these cupcakes, I brought in another one of my favorite things: s'mores.  I combined the versatility of cupcakes with one of the most perfect flavor combinations in the world.  The cupcake is composed of a graham cracker cupcake, marshmallow fluff filling, malted milk chocolate frosting, and toasted marshmallow frosting.  Then the cupcake is drizzled in dark chocolate ganache, topped with a ganache-dipped graham cracker, and lightly sprinkled with more graham cracker crumbs. 

          The cupcake was moist and soft, with a strong vanilla-graham cracker taste.  Originally, I wanted to make a cupcake out of graham flour, the actual flour used to make graham crackers, but since I couldn't find it, I used crushed graham crackers instead.  Very finely crushed graham crackers is a lot similar to flour.  

          Using the coning method, I filled the cupcakes with marshmallow fluff.

           The malted milk chocolate frosting was perfect for the cupcake.  It had a slight marshmallow-y taste, so it contributed a great s'more flavor.  The frosting is an easy-to-make buttercream with chocolate malt powder and melted milk chocolate incorporated.  

           The toasted marshmallow frosting is made with marshmallow fluff and oven-toasted marshmallows.  To toast the marshmallows, just turn on the broiler in your oven and place some large marshmallows on a baking sheet and put them in the oven for a few moments, watching carefully so that they don't burn.  Make sure to spray the baking sheet so that the marshmallows don't stick.  I like broiling marshmallows and sandwiching them in graham crackers just whenever I'm in the mood for a s'more.  

            To frost the cupcakes, I used a large French decorating tip.  I piped a dollop of chocolate frosting, and then a smaller dollop of marshmallow frosting on top of that.  Then I reheated some leftover ganache I had and piped it on top of the frosting in a zig-zag pattern.
             The only that makes me sad is that the appearance was ruined while I was transporting the cupcakes to the fair. The cupcakes tumbled around in the box, so I ended up with a cupcake with a mess of brown frosting on top (oops). It's fine though, and I also made two other things for the fair, which I will post in the future.  

              Enjoy!

S'mores Cupcakes

makes 12 frosted and filled cupcakes
cake recipe adapted from Bon Appetit, frosting adapted from Sweetapolita

Ingredients

For the graham cracker cupcake:
1-1/2 cups fine graham cracker crumbs (about 10 crackers ground in a blender or food processor)
1/2 cup all purpose flour
2-1/2 teaspoons baking powder
1/2 cup (1 stick) unsalted butter, room temperature
3/4 cups sugar
2 large eggs, at room temperature
1 teaspoon vanilla extract
3/4 cup whole milk, at room temperature

For the malted milk chocolate buttercream:
1 cup unsalted butter, at room temperature
2 cups confectioners sugar, sifted
1/4 cup plus 2 tbs chocolate malted milk powder
1-1/2 tsp vanilla extract
pinch of salt
4 oz quality milk chocolate

1/4 cup heavy cream

For the toasted marshmallow frosting:
8 large marshmallows
1/2 cup confectioners sugar, sifted
1/2 cup butter, at room temperature
1/4 teaspoon vanilla extract

1/2 jar (3.5oz) marshmallow fluff

For assembling:
4 oz bittersweet chocolate, chopped
1/4 cup heavy cream
about 1/4 cup marshmallow fluff
graham crackers, cut into 12 small rectangles
more graham cracker crumbs, if desired

Directions

Make the cupcakes:
  1. Preheat oven to 350°F. Line 12 standard muffin cups with paper liners. 
  2. Whisk graham cracker crumbs, flour, baking powder, and pinch of salt in medium bowl. 
  3. Beat butter and sugar in large bowl until light and fluffy. Add eggs one at a time, beating to blend between additions. Beat in vanilla. 
  4. Add graham-cracker mixture in 3 additions alternately with milk in 2 additions, beginning and ending with graham-cracker mixture. Divide batter among muffin cups.
  5. Bake cupcakes until tester inserted into center come out clean, about 22 minutes. Transfer cupcakes to rack; cool completely.
Make the malted milk chocolate frosting:
  1. Cream together the butter and confectioners sugar until smooth and fluffy.
  2. Add malt powder, vanilla and salt, and beat on low speed until well combined. Add the melted chocolate and beat on medium speed until smooth (about 2 minutes).
  3. Add whipping cream and beat on medium-high speed for another minute.
Make the toasted marshmallow frosting:
  1. Place marshmallows on baking sheet lined with parchment paper or foil and sprayed with nonstick cooking spray. Place on lower rack of oven, and broil marshmallows until nice and brown on top, between 30-60 seconds. Remove pan from oven and gently turn the marshmallows over, and broil until they are golden brown on both sides.  Watch carefully and make sure they don't burn.
  2. Beat together the butter and confectioners sugar.  Add vanilla and beat for 3 minutes.  Add marshmallows and marshmallow fluff and mix for one minute on low speed.
Assemble:
  1. Make a bittersweet ganache by bringing 1/4 cup heavy cream to a simmer.  Pour the hot cream over 4 oz chopped chocolate and let sit for 30 seconds, then mix until all the chocolate is melted and smooth. 
  2. Cut a cone shape out of a cooled cupcake and fill the hole with about 1 tsp marshmallow fluff. Press the cone shape back in place.
  3. Pipe some chocolate frosting on top of the cupcake, and then pipe marshmallow frosting on top of that.
  4. Pipe the ganache on top of the frosting in a thin, zig-zag pattern. Dip graham cracker pieces in remaining ganache and place in the cupcake frosting.  Sprinkle cupcake with graham cracker crumbs, if desired.