Showing posts with label chocolate. Show all posts

Thursday, August 22, 2013

Dulce de Leche Stuffed Mexican Chocolate Cookies


       I'm in the process of coming up with some recipes for a themed bake sale I'm holding at school.  The particular theme I'm working on is "ancient civilizations," which is pretty hard since ancient people basically ate some type of meat and grain, and that was it.  Anyways, I came up with these cookies to represent the ancient Incas, since they lived in what is now Mexico and (fortunately) had access to cocoa beans.  


       This is a thick, dark chocolate cookie with a dash of cinnamon, filled and stuffed with dulce de leche. The good thing about stuffing the cookies with dulce de leche is that the filling never hardens and always remains gooey.  Other caramel-stuffed cookies have to be eaten warm.  Also, these cookies are big, about the size of the palm of your hand, so they are perfect for selling.  

        Dulce de leche is a common Mexican ingredient, which is like carmelized milk.  You can buy it at a grocery store, or you can make it by yourself out of sweetened condensed milk.  Since I had a can of sweetened condensed milk already sitting in my pantry, and curiosity, I decided to go with the latter option. 


         There are lots of ways to make dulce de leche (just google it).  I chose the oven method.  All you need is a roasting pan, hot water, a glass dish that fits in the roasting pan, an oven, and a can of sweetened condensed milk.  
Place one can of sweetened condensed milk in a glass dish. I used a pie plate.
Cover the dish tightly with foil.
Place the dish in the roasting pan.  Pour hot water into the pan until it reaches halfway up the sides of the glass dish. Remove the dish from the roasting pan, and place the roasting pan on the bottom rack of the oven.  Preheat the oven to 425*F. 
When the oven is heated, place the glass dish back into the roasting pan.  Bake for 1 hr and 15 minutes.  Check the water level in the pan every half hour and add water if necessary.  Take the glass dish out of the oven and let cool for at least  hour. 
Remove the foil.  You should have a deep brown caramel. 
Stir the dulce de leche in a bowl until smooth and refrigerate until completely cool.  
     Making the cookies is very simple.  To start, you make a simple chocolate cookie dough.  It will be very thick.
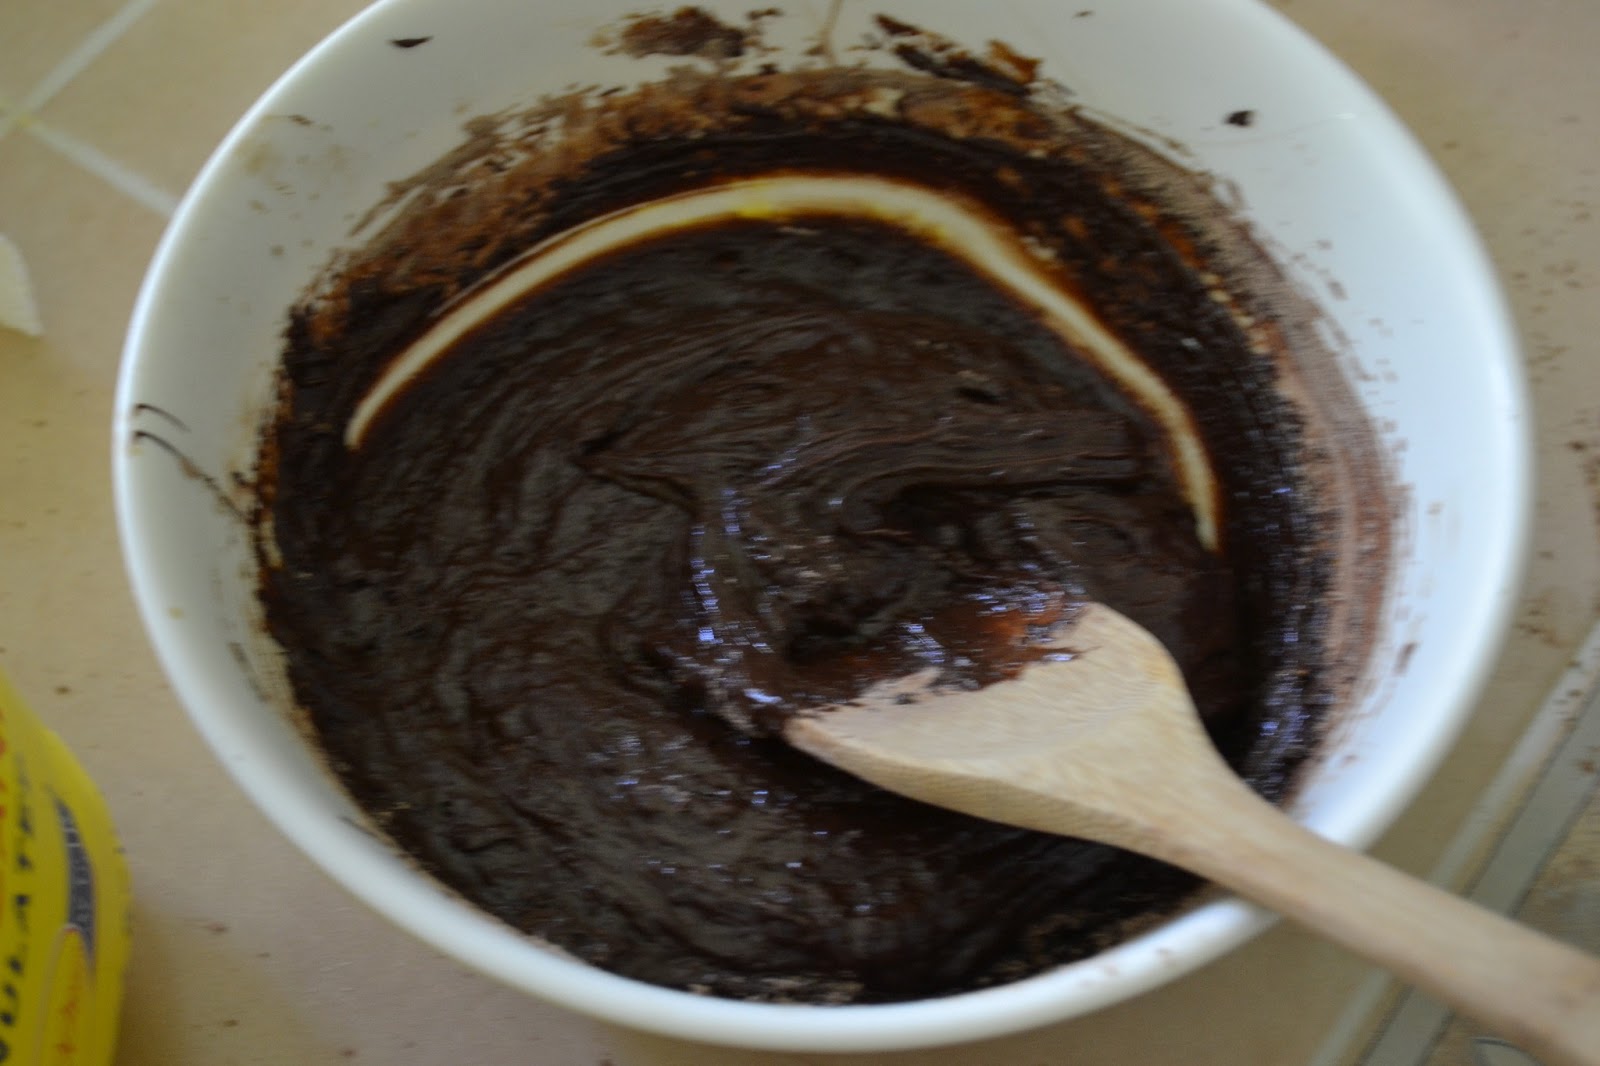
Make the chocolate cookie dough.
Make a cinnamon-sugar mixture out of 3 tbs granulated sugar, 1 tsp cocoa powder, and 2 tsp cinnamon.

Scoop rounds of tbs of cookie dough onto a parchment-lined baking sheet,  1-1/2 inches apart.  Then scoop about 1 tsp of  dulce de leche on top.

Scoop another 2 tbs of chocolate cookie dough on top of the dulce de leche.  Pinch the dough into a ball to enclose the dulce de leche.  Roll it in the cinnamon sugar and place back on the baking sheet.  Press the dough down to a make a disk about 3/4" in diameter. 
 Bake at 350*F for 16-20 minutes.  Let cool.
Pipe more dulce de leche on top. 
       I was excited to make these cookies and I'm happy with how they turned out.  I already had all the ingredients at home, so I didn't have to wait for anyone to take me to the grocery store (which I hate doing; once I have a recipe in my mind, it's all I can think about until I actually make it).  The cinnamon and dulce de leche really add flair to the rich but ordinary chocolate cookies.

        If you want a spicier Mexican chocolate cookie, try adding 1/4 tsp chili powder to add warmth.

      Enjoy!

Dulce de Leche Stuffed Mexican Chocolate Cookies

makes 12 large cookies
adapted from My Baking Additction

Ingredients

For the Cookie Dough:
2 sticks cold and cubed unsalted butter
1 cup granulated sugar
1/4 cup light or dark brown sugar
2 eggs
1/2 cup good quality dark cocoa powder (like Hershey's Special Dark)
2 1/4 cups all-purpose flour
1/2 tsp coarse salt
1 teaspoon baking powder
1 tsp ground cinnamon
For Finishing:
about 1 cup dulce de leche (see above for instructions for homemade)
3 tbs granulated sugar
2 tsp ground cinnamon
1 tsp cocoa powder

Directions

  1. Preheat oven to 350*F.  Line 2 baking sheets with parchment paper or silicon baking mats.
  2. In a large bowl, cream together the butter and sugars until well-combined. Then beat in the eggs, one at a time.  Mix in the cocoa powder well.  
  3. Whisk together the flour, salt, baking powder, and cinnamon in a medium bowl, and then fold into the wet ingredients until combined.  
  4. Scoop 2 tbs of dough onto the cookie sheets, 1-1/2 inches apart.  Scoop 1 tsp of dulce de leche on top of the dough, and then scoop another 2 tbs of dough on top.  
  5. Pinch the dough around the dulce de leche filling to form a ball.
  6. In a small bowl, whisk together the sugar, cinnamon, and cocoa powder for finishing.  Roll the balls of cookie dough in the sugar mixture and place back on the cookie sheets.  Press the dough balls into 3/4" thick disks.  
  7. Bake the cookies in the preheated oven for 16-20 minutes.  Let cool on the pans for 5-10 minutes, then transfer to a cooling rack to cool completely.
  8. Fill a piping bag with dulce de leche and pipe onto the cooled cookies in any pattern you wish.  Store the cookies at room temperature in a sealed container.  


Tuesday, June 25, 2013

Chunky Monkey Cookies

     
       I like putting pretzels, peanuts, and pine nuts in my nutella or PB&J sandwiches.  It's because when you bite through the soft bread and feel the crunch of the pretzel or nuts, it's like you're snapping the bones of a small creature.  Totally not weird or anything.

       These cookies have a lot of the same textures I like in my sandwiches.  There are the white chocolate chips and the salty peanuts for crunch and some smooth pockets of melted semi-sweet chocolate when you eat the cookies warm.  And the cookie is very soft and chocolatey. It's just like eating a monkey (a species that is made of chocolate and deliciousness).

        The cookies don't spread much, so if you make rounded scoops, the cookies will stay round.  If you want flatter cookies, just press down on the cookies so that they have the shape you want.  Spherical cookies are pretty cute, too, you know.  


         I really like the flavors in this cookie.  There is a lot of chocolate, which is always good.  There are bittersweet chocolate, unsweetened cocoa powder, unsweetened chocolate, white chocolate chips, milk chocolate chips and chopped semisweet-chocolate.  White chocolate isn't technically chocolate, but it goes super well with the rich chocolate cookie and balances with the slight bitterness of other chocolates. Also, the salty chopped peanuts check the sweetness of the cookie.

First, melt together chocolate and butter and set it aside to cool.
Whisk together the dry ingredients like my brother is doing here.
Beat together the eggs, sugar, and vanilla until foamy.

Stir in the chocolate and dry ingredients until incorporated. 


Now, to have a proper chunky cookie, I suggest buying a bar of chocolate and chopping it yourself.  It's good if the pieces are uneven sizes. 
Stir in the chocolate chips/chunks and nuts.
Scoop the dough onto a baking sheet.
Bake until the tops are dry but the cookies are still moist.
Enjoy!

Chunky Monkey Cookies

adapted from Baking: From My Home to Yours by Dorie Greenspan
makes about 24 cookies

Ingredients

1/3 cup flour
1/4 cup unsweetened cocoa powder
1/2 teaspoon salt
1/4 teaspoon baking powder
3 tablespoons unsalted butter, cut into several pieces
6 ounces bittersweet chocolate, coarsely chopped
1 ounce unsweetened chocolate coarsely chopped
2 large eggs
2/3 cup sugar
1 teaspoon vanilla
6 ounces semisweet chocolate chips or chunks
6 ounces milk or white chocolate chips or chunks
1 1/2 cups salted peanuts, chopped

Directions

  1. Place an oven rack in the center of your oven and preheat to 350 degrees F. Line two baking sheets with parchment paper.
  2. Whisk together the flour, cocoa powder, salt and baking powder. Set aside.
  3. Melt the butter, bittersweet chocolate and unsweetened chocolate together in a bowl over a pot of simmering water, or in the microwave, stirring constantly until smooth.  Set aside to cool.
  4. In a large bowl beat the eggs and sugar together with an electric mixer on medium high speed until the mixture is pale and foamy, about 2 minutes. Beat in the vanilla and scrape the sides of the bowl. Add the melted chocolate mixture and beat on low speed just until combined.
  5. Add the flour mixture, mixing just until there aren't any streaks of flour.  Stir in the chocolate chips/chunks and nuts.
  6. Drop the dough by generously heaping tablespoonfuls onto prepared baking sheets about 1 inch apart. Bake the cookies one sheet at a time for 10 to 12 minutes. The tops should look dry but the interiors should still be soft.
  7. Transfer cookies to a cooling rack to cool completely.


Monday, May 6, 2013

Strawberry Chocolate Macarons


     Nothing impresses these days like a macaron.  I brought a tray of these to cooking club and they were gone before the meeting started.  Most people think you need magical powers or some innate ability to make them, but that isn't true.  All you need is some patience, precise measurements, and the ingredients.

      I decided to make chocolate-strawberry macarons this time.  I've never made either flavor before, but I figured that they would make the perfect combination.  After shooting the photos, I realized that these would also make really cute "Neapolitan" macarons if you filled them with white vanilla buttercream instead of ganache and strawberry jam.  But I also feel that the ganache and strawberry filling bring out the flavors of the shells. 


      I'm sorry to say I don't really know how the flavors turned out.  As I said, I brought these to cooking club and they just vanished.  I had some extras in my fridge, but those disappeared too.  My family just doesn't understand that macarons need to mature in the fridge for a couple of days before you eat them.  I heard that they were good, though.  And I'm sure they are; I've never had a bad macaron.
This is how the batter should look.

     If you want some macaron tips, basically this is it:
  • bake one sheet at a time on new, unused parchment paper
  • don't over-mix or under-mix (follow directions)
  • make precise measurements with a kitchen scale (I actually bought by first scale for the sole purpose of making macarons, so you should too.  You can get a cheap one for 5 bucks at Target) 
  • let the macarons sit on the baking sheet after you pipe them for about half an hour to prevent cracking
  • after you fill the macarons, let them sit in the refrigerator for a couple of days so that the flavors can develop more
  • have fun and don't worry too much
  • see here for more detailed step-by-step pictures of the process
      I hope you enjoy!

Strawberry Chocolate Macarons

makes about 30 assembled macarons
recipe adapted from Tartlette and Chocoparis

Ingredients

For the strawberry shells:
90g egg whites (about 3) 
30g granulated sugar
200g  powdered sugar
110g ground almonds/ almond flour
1/2 cup (7g) dehydrated strawberries, crumbled to a fine powder
pink food coloring
For the Chocolate Shells:
90 grams (3 ounces) of egg whites (equal to whites of 3 large eggs), at room temperature
125 grams (4 ½ ounces) of ground almonds or almond flour
125 grams (4 ½ ounces) of icing sugar
25 grams (1 ounce) unsweetened cocoa powder 
125 grams (4 ½ ounces) of caster sugar (aka superfine sugar, or regular sugar pulsed in a blender for a few seconds)
For the filling:
6oz bittersweet chocolate, chopped
1/2 cup heavy cream
strawberry jam (I used the strawberry balsamic jam I made)

Directions

Prepare the strawberry macarons: in a stand mixer fitted with the whisk attachment, whip the egg whites to a foam, gradually add the sugar until you obtain a glossy meringue with soft peaks.  Stir in the food coloring until evenly incorporated. Sift together the almonds, powdered sugar, reserved powdered strawberries. Add it to the meringue, give it a quick fold to break some of the air and then fold the mass carefully until you obtain a batter that falls back on itself after counting to 10. Give quick strokes at first to break the mass and slow down. The whole process should not take more than 50 strokes. Test a small amount on a plate: if the tops flattens on its own you are good to go. If there is a small beak, give the batter a couple of turns.
Fill a pastry bag fitted with a large round tip with the batter and pipe small rounds (1.5 inches in diameter) onto parchment paper or silicone mats lined baking sheets. 
Preheat the oven to 280F and position a rack in the center. Let the macarons sit out for 30 minutes to an hour to harden their shells a bit and bake for 15 to 20 minutes, depending on their size. Let cool.
Prepare the chocolate macarons: Sift together the almond flour or ground almonds, icing sugar, and cocoa powder; set aside. Beat the egg whites with a bit of the superfine sugar for a few seconds until foamy.  Whip the egg whites on high speed, gradually adding the rest of the superfine sugar, until the meringue has soft peaks when you lift out the beaters.  Fold in the dry ingredients until the batter drips from the spatula like a ribbon.  Pipe the batter into rounds on clean parchment lined baking sheets.  Let the batter rounds sit for about half an hour until the surface is dry and firm.  Bake at 325*F for 12 to 14 minutes and let cool.
Fill.  Make the ganache by boiling the heavy cream, then pouring the cream over the chocolate in a small bowl.  Whisk until the chocolate is all melted and let cool until the ganache is thick.  Pipe some jam into the middle of one macaron shell.  Pipe the ganache around the jam and press another shell on top.  Repeat for the rest of the macarons.  Keep the macarons in an airtight container and refrigerate for a few days before serving so that the flavors can develop.  


Sunday, April 28, 2013

Chocolate Covered Strawberry Pop-Tarts From Scratch


I really like of Pop-Tarts, so when I saw a recipe for making them from scratch, I knew I had to try.

I used a basic pastry dough recipe from Flour by Joanne Chang, and then put homemade strawberry balsamic jam between two rectangles of it.  I then baked it and coated the pastries with chocolate glaze and sprinkles.

It wasn't really a Pop-tart, but it was delicious.  They reminded me of flakier, butterier versions of the Pillsbury Toaster Strudel.  But of course, these were much better than those treats you get from the freezer.  

These do require a little time and effort to make.  You have to refrigerate the dough for at least four hours before using it, and I suggest that if you have  warm kitchen, you should return the dough to the refrigerator a couple of times while you're cutting out rectangles.  Otherwise, the butter will melt and it'll be much harder to make  a good looking toaster pastry.

You can use store-bought jam, but I decided to make my own jam from fresh strawberries and balsamic vinegar.  The vinegar really brings out the sweetness from the strawberries.

The result has a texture and flavor similar to that of a croissant, only it's not as soft on the inside. I also love the strawberry filling combined with the chocolatey glaze.  I'm definitely going to make these again.  You can mix it up and use any fillings and glazes you want.

Enjoy!

To make the jam: cook the strawberries with the sugar and vinegar.
It's ready when it looks like this.
Here's the cooled jam, ready to use.
I stored my jam in a Smucker's strawberry jam jar.  (Very resourceful, I know)
To make the dough, mix cold butter pieces with the dry ingredients until incorporated. 
Then stir in egg yolks and milk until it forms a shaggy dough.
Place the dough on an unfloured surface.  Form a tight mound.
Starting from the top of the mound, slide your palm down the mound, flattening the dough.  Repeat for all sides., until you have a flat dough with smears of butter. 
Gather up the dough, cover in plastic wrap, press into a disk , and refrigerate for at least 4 hours or up to a couple of days.
Divide the dough in half and roll each half into a rectangle.

Score one rectangle into 8 smaller rectangles and brush this with egg.

Put on some jam.

Place the other sheet of dough on top, cut into 8 rectangles, then bake.


Let the pastries cool.


Whisk together the glaze.


Pour the glaze on the pastries, put on some sprinkles, let the glaze set, and enjoy!

Chocolate Covered Strawberry Pop-Tarts

makes 8 large pastries
adapted from Flour by Joanne Chang

Ingredients

For the Pastry Dough:
1-3/4 cups (245g) all-purpose flour
1 tbs sugar
1 tsp coarse salt
1 cup (2 sticks/288g) cold unsalted butter, cut into 12 pieces
2 egg yolks
3 tbs cold milk

For the Filling:
Strawberry balsamic jam (recipe below) or other strawberry jam

For the Glaze:
1/2 cup confectioners sugar
1/4 cup water
1 oz bittersweet chocolate, melted and cooled

To Finish:
1 egg, beaten
sprinkles (optional)

Directions

  1. Make the pastry dough: In a large bowl, whisk together the flour, sugar, and salt.  Mix in the cold butter pieces until the flour is clumpy and there are pecan-sized pieces of butter visible.  Whisk together the egg yolks and milk in a separate bowl, and then add to the flour mixture.  Mix for a few seconds until incorporated and the dough looks shaggy.  On an unfloured surface, form the dough into a tight mound.  Starting from the top, slide your palm down the sides, pressing the dough flat until the butter is smeared and the dough comes together.  Gather the dough into a ball, then wrap in plastic wrap and press into a disk 1" thick.  Refrigerate for at least 4 hours.
  2. Split the pastry dough in half.  Keeping the other half refrigerated, place on half on a floured surface. Place a sheet of plastic wrap on top and roll the dough into a 14" by 11" rectangle.  Return this half to the refrigerator and roll out the other half of the dough to the same dimensions.  With a knife, score one sheet of dough into 8 smaller 3-1/2" x 5-1/2" rectangles.  Brush this dough with beaten egg and place 2 tbs of jam into the center of each small rectangle.  Carefully place the other sheet of dough on top and lightly pres down.  Cut the dough into 8 rectangles, following the score marks you made.  
  3. Place each rectangle on a parchment lined baking sheet and bake at 350*F for 30-40 minutes, until the pastries are light golden brown.  Let cool for half an hour.  
  4. Make the glaze: whisk all the the ingredients for the glaze together in a small bowl until smooth and pourable.
  5. Pour the glaze on each cooled pastry and then sprinkle the pastries with sprinkles, if desired.  Allow the glaze to set for 10-15 minutes.  
  6. Store pastries in an airtight container at room temperature for up to 2 days. 

Strawberry Balsamic Jam 

recipe adapted from Savory Sweet Life

Ingredients

2 cups chopped strawberries
1 cup sugar
2 tbs balsamic vinegar

Directions


  1. Add the chopped strawberries, sugar, and balsamic vinegar to a large pot. Simmer until strawberries are tender, about 20 minutes, stirring occasionally. 
  2. If you have an immersion blender, puree strawberries right in the pot until slightly smooth but still slightly chunky. If you don’t have an immersion blender, transfer the mixture to a food processor or blender and pulse until desired consistency, then add the mixture back to the pot.
  3. Bring the mixture to a gentle boil, and cook for 30 minutes, allowing the mixture to thicken. Stir frequently to ensure the mixture doesn’t burn on the bottom of the pot. It's ready when it's thick enough that when you stir, you can see the bottom of the pot.  


Friday, April 12, 2013

Nutella Swirl Brownies


     Don't you just love Fridays?  This day of the week marks the end of a week of hard, sometimes tedious, work.  This last week seemed especially long for some reason.  Maybe because it was my first week back from spring break.

      I was craving brownies today.  And since it's Friday, I can take some time to go through the process.  So the moment I got home, I started thinking about what I could do to jazz up these brownies.  I looked around, and there on my counter was a big jar of Nutella, which my mom bought at BJ's a couple of weeks ago.  There was still a good amount left in there.  It was perfect.

      Honestly, I can eat Nutella straight from the jar with a spoon.  It's delicious, and the flavor can't get much better.  But by blending Nutella into a chewy, rich brownie, you create the perfect treat which satisfies all of your cravings.  And yeah, brownies on their own are great, but....

      ...these are phenomenal. The brownie part is perfect.  Chocolatey, moist.  The Nuttella part takes it to another level.  It adds a subtle hazlenut flavor, making the brownie taste like a Ferrero Rocher.  Chocolate and hazelnut may be as perfect a match as chocolate and peanut butter.  It's a love triangle.

      So, how do you celebrate Fridays?  With baked goods, or maybe by watching the Brides-Day marathon on TLC?

       I hope you enjoy!
First, make the nutella part by mixing nutella with an egg and  some flour.

To make the brownie batter, start by whisking together the flour and cocoa powder.

In a large bowl over simmering water, melt together the chocolate and butter.

Add sugar and salt.  Then add vanilla. 
Stir in the dry ingredients until just incorporated.  You should still be able to see some flour. 
You will now have two batters.  Either can be baked on it's own, but this couple is meant to be.
Spray a square pan with baking spray and line with parchment paper.
Pour the brownie batter into the pan.  Then drop spoonfuls of the nutella batter on top.  
Swirl around the two batters with a toothpick, skewer, or chopstick. 
Bake until a toothpick comes out with crumbs. 
You should wait for the brownies to cool completely in the pan before removing  and cutting them.  This may be difficult, but it makes cutting the brownies easier.   
Enjoy!

Nutella Swirl Brownies

makes 16 2-in square brownies
adapted from the Baked brownie

Ingredients

For Nutella Swirl:
3/4 cup chocolate hazelnut spread
1 large egg
2 tbs all-purpose flour

For Brownie:
1/2 cup plus 2 tbs all-purpose flour
1 tbs unsweetened, preferably dark, cocoa powder (sift if lumpy)
1/2 cup (1 stick) unsalted butter
1/2 tsp espresso powder
5.5 oz bittersweet chocolate, chopped
3/4 cup granulated sugar
1/4 cup light brown sugar
1/2 tsp salt
2 large eggs
1 tsp vanilla extract

Directions

  1. Preheat oven to 350*F.  Grease or spray a 9"x 9" square pan, line with parchment paper, and grease/spray again.
  2. In a small bowl, combine the the nutella and egg for the nutella swirl until well blended.  Stir in flour.  Set aside.  
  3. In another small bowl, whisk together the flour and cocoa powder for the brownie. 
  4. Place the butter in a large bowl set over simmering water.  When the butter is melted, stir in the espresso powder and chocolate until melted.  Stir in the sugars and salt.  Remove the bowl from heat.  Then whisk in the eggs, one at a time, until blended. Stir in the vanilla.  
  5. Fold in the dry ingredients until just incorporated and a bit of flour is visible.  Pour the brownie batter into the prepared pan.  Drop spoonfuls of the nutella mixture on top and swirl into the brownie batter with a toothpick or skewer.  Bake in oven for 20-25 minutes, until a toothpick comes out with moist crumbs.
  6. Let the brownies cool completely in the pan, for at least 30 minutes.  Remove the brownies and cut into squares.  Enjoy or store in an airtight container.