Tuesday, January 22, 2013

Marshmallow Fondant

       Next Friday is my favorite little brother's 4th birthday.  Of course I'm going to make him a super special birthday cake. This was him last year (Isn't that priceless?).  Now I'm going to make him a confetti cake with strawberry icing and an Umizoomi theme. You know what that is?  Its one of the most annoying shows ever, but it is educational. Well, the first step is to make the fondant.  Now, I don't really like fondant, but since this is my brother I'm making it for, it has to happen.
       Marshmallow fondant takes care of most of the taste issue with regular fondant. It's also a lot cheaper than buying fondant. I don't tend to eat it, since it's too sweet for me (it's pretty much pure sugar after all) but my friends think it's good. It's really easy to work with, and it doesn't get sticky or shiny.  To color it, you just knead in food coloring and you can also flavor it by kneading in extracts. To flavor it, I diffused some extract in the water that I kneaded into the dough. You can also make chocolate fondant by kneading in 4 oz of melted chocolate.  Now that sounds delicious.
     Also, it stores for a long time (a couple of months when refrigerated) so you can make it ahead and focus on the cake.
       There are a few different methods for making this recipe.  If you don't have a stand mixer (like me) then it may get a bit messy.  
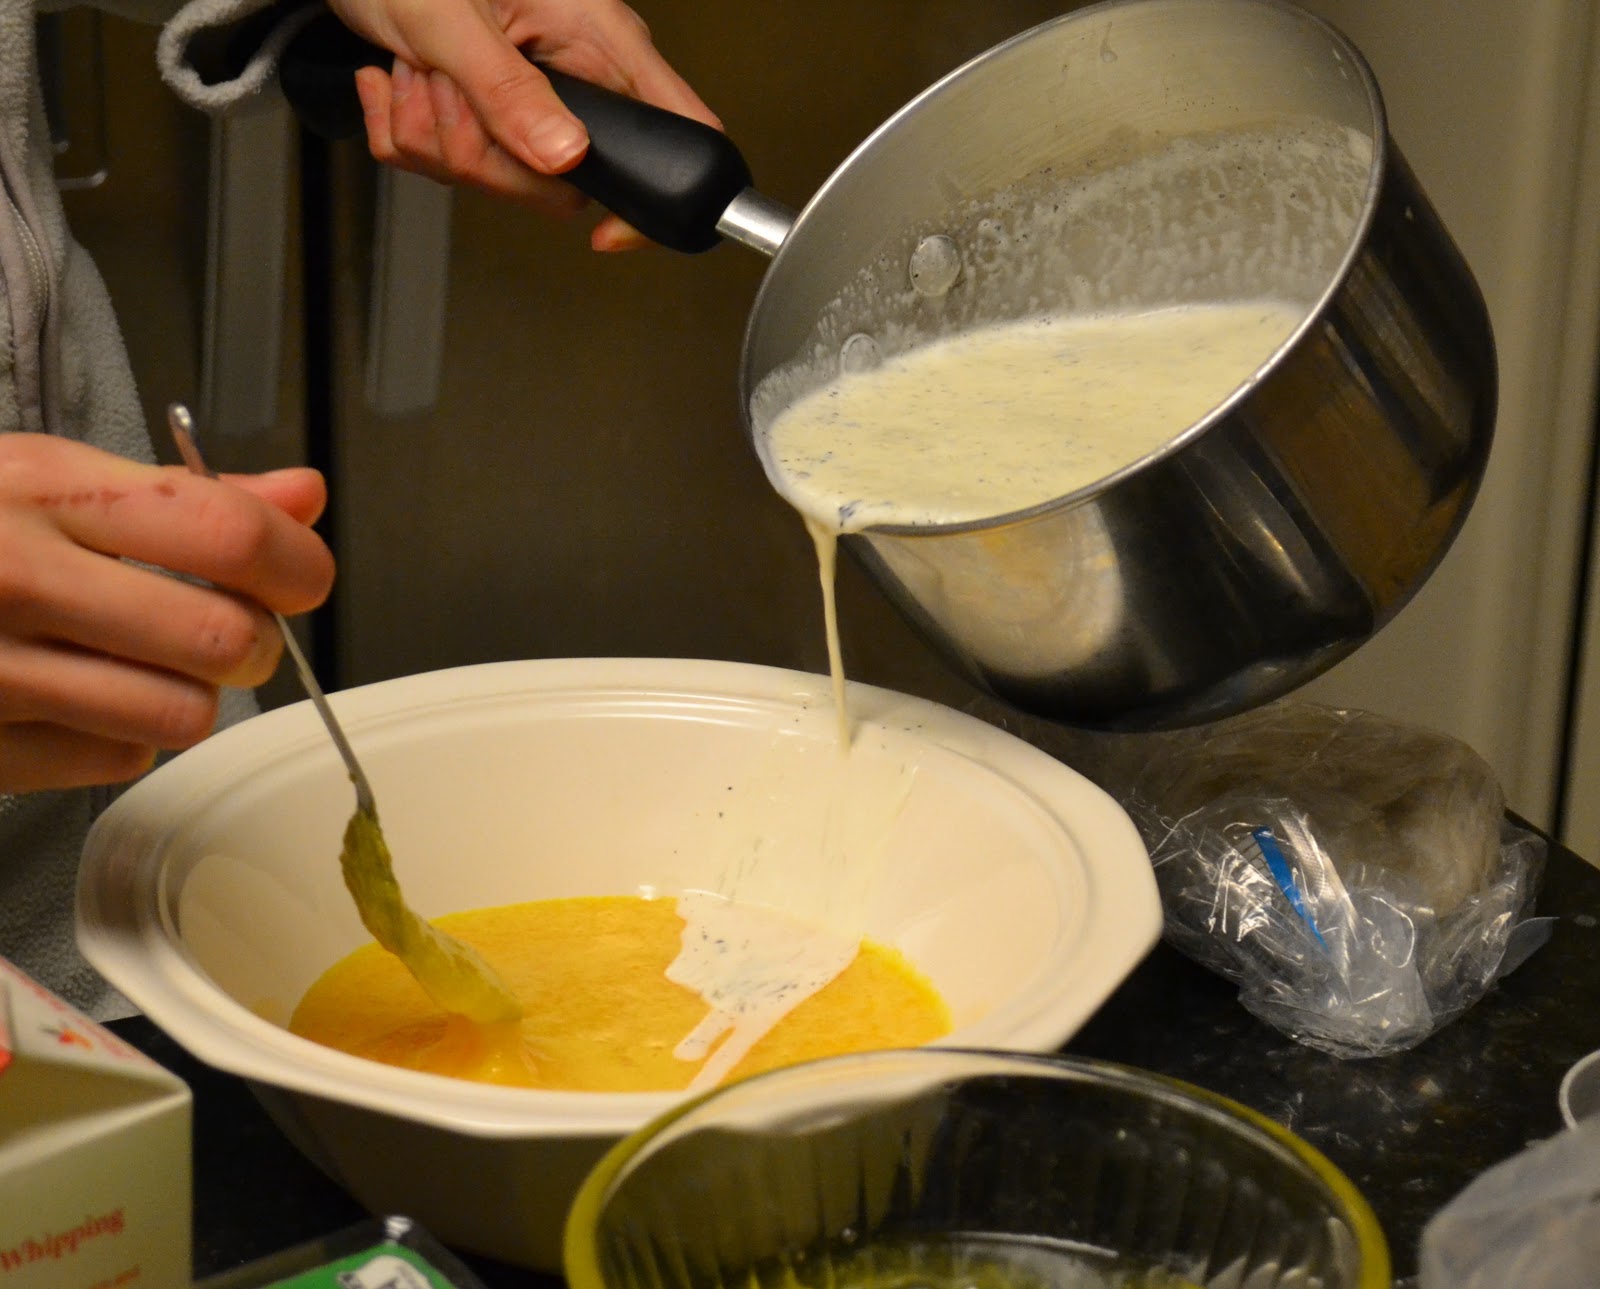
       First, melt the butter. Either with the double boiler method (shown below) or in the microwave.


Add some of the marshmallows. (As much as your bowl can hold.)

Stir, stir, stir until smooth. (Meanwhile, keep adding marshmallows.)
Resist the urge to dump in a box of rice krispies and call it a day.
Done!

       If using the microwave, just keep adding marshmallows and stir at thirty second intervals.

       Here's the fun part.
       If you have a stand mixer: Pour half the sugar in the bowl , then the marshmallow mixture, and then the rest of the sugar.  Mix on the lowest setting and add water a half of a teaspoon at a time if it gets too dry (don't use too much.) Mix just until a dough forms. Move to next step.
       If you're kneading by hand: pour half of the sugar on top of the marshmallow mixture.  Generously dust a counter top or board with confectioners sugar.  Pour the marshmallow mixture in the middle and lightly knead until it forms something like a dough.  Move on to next step.

      Keep adding sugar until all two pounds are in there.  If the dough starts to tear, add a bit of water, but not too much or it'll be too sticky and less stable.  Knead until the dough is firm and smooth.

When to add water.
Done!
       When done kneading, seal in a ziplock bag, squeezing all the air out.  (Or wrap in plastic wrap.)  Let sit 12-24 hours at room temperature before using.  Keeps in refrigerator for about a month.

And you're done! Use the fondant to cover cakes and make cute decorations.

Marshmallow Fondant

makes about 3 lbs, enough to cover and decorate a two tier cake
modified from Bakingdom

Ingredients

20 oz mini marshmallows
1/2 cup of butter
2 lbs confectioners sugar
a bit of water

Directions

  1. Melt the butter in the microwave or a double boiler (a bowl set over a pot of simmering water).
  2. Add some of the marshmallows.  If using a microwave, microwave at thirty-second intervals, stirring in between until smooth and lump-free.  If using the double boiler, stir constantly until smooth.
  3. Keep adding marshmallows until all are melted and smooth.
  4. If using a stand mixer:  place half the sugar in the bottom, then the marshmallow mixture, and then the rest of the sugar.  Mix on lowest speed until a dough forms. Add water by the 1/2 tsp if it becomes too dry. Move to step 6.
  5. If kneading by hand: generously dust a surface (counter-top) with confectioners sugar.  Pour half of the sugar on top of the marshmallow mixture, then pour it onto the counter.  Knead gently until a dough forms.
  6. On a surface dusted with confectioners sugar, knead the dough while gradually adding the rest of the sugar. If it begins to tear, add a bit of water. Be careful not to add too much water.  
  7. When the dough is smooth and all the sugar is added, place it in a ziplock bag and squeeze all the air out or wrap in plastic wrap.  Keep it at room temperature for 12-24 hours before using. You can refrigerate it for over a month, just leave it out at room temperature for a few hours before using so it softens. 
  8. Make decorations.  To color it, add food coloring (I use wilton icing colors) and knead until homogeneous. To flavor it, do the same with extracts.  You can also add 4oz of melted chocolate and knead it in to make chocolate fondant.  


Monday, January 21, 2013

Simple Asian Sponge Cake


     The truly fantastic about Asian bakeries is the sponge cake.  A simple, fluffy cake with whipped cream filling, it may not look like much.  But once you take your first bite, I'm sure you'll fall in love with it.  Just like I am.  
My grandma's handwriting
     The flavor is truly unique.  And once I learned that I could recreate it at home, I was super excited.  I got the recipe from my grandma.  She's an amazing cook, but doesn't make dessert much.  She wrote down this recipe in Chinese after learning from one of her friends, and I was afraid that after my mom translated it for me, some of the details would be lost in translation.  So I took some guesses and fixed some things based on my previous knowledge, and the result was fantastic!  Soft and pillowy, just like the ones from the bakery. It's so cool how such a thing can come out of essentially 5 ingredients.


      The first step is to separate ten eggs.  And don't get one drop of yolk in the whites.  Then beat the egg whites to soft peaks, and then add half of the sugar and mix.  
These eggs need to be separated. 


  • Make sure the beaters and bowl are grease-free.  To do this, you can rub lemon juice on the utensils.
  • Egg whites separate more easily when cold.
  • Chill the bowl and beaters for a bit in the freezer.
  • Don't over-beat the egg whites, or they won't have room to expand while baking.  

      Once that is done, it's time to deal with the rest of the ingredients.  The flour part is a bit tricky.  The recipe says to use 2/3 cups of cake flour, but to sub a bit of it with all-purpose flour so as to prevent the cake from falling. How much, I don't know.  So what I did was put two tablespoons of AP flour into a bowl on a scale and then filled the bowl with cake flour until it reached 80g, or 2/3cup.  This combination worked pretty well, I think, but maybe a tad more AP flour (you can experiment with it). Then just add the flour, vanilla, and the other half of the sugar to the egg yolks and beat until light and creamy (about 5 minutes).
     Add a bit of egg yolks to the egg whites and fold a bit.  Then, fold in the rest of the yolk mixture and mix until combined (don't over-mix).  Spread the batter into the pan and bake at 350*F for 12-15 minutes, until a toothpick comes out clean. I may have taken it out too soon, as it was a tad sticky and fell a bit.  Also, I used an 18" pan, but another size would probably work as well.


       Meanwhile, beat some whipping cream until it has stiff peaks.  When the cake is done baking, you should flip it onto a towel dusted with confectioners sugar and then roll it up in the towel.  Then when it is cool, you add the filling.  I didn't do this because the recipe didn't say to, but it would probably improve the shape.  I added mangoes to the filling because I had them on hand and they are really good.


Yup, it's really easy to make and well worth the effort!  Enjoy!

Simple Asian Sponge Cake

Ingredients

10 eggs, separated
1 cup sugar
2/3 cup minus 2 tbs cake flour
2 tbs all-purpose flour
1 tsp vanilla

About 1 cup whipping cream, whipped to stiff peaks

Directions

  1. Preheat oven to 350*F. Spray a jelly-roll pan with cooking spray, line with parchment, and then spray again.
  2. Beat the egg white until soft peaks form (they will fall over a little bit).  Add 1/2 cup of sugar to the mixture and mix until incorporated.
  3. Measure out the flour and add to the egg yolks, along with the sugar and vanilla. Beat until light and creamy, about 3-5 minutes.
  4. Add the yolk mixture to the whites, and fold with a spatula until incorporated. Don't over mix.  
  5. Spread batter into prepared pan.  Bake in oven 12-15 minutes, or until a toothpick comes out clean.
  6. Flip onto a towel dusted with confectioners sugar and roll up along the length. Once cool, unroll and fill with whipped cream and fruit if desired.  Best if served on same day.


Saturday, January 12, 2013

Whole Wheat Baby Arugala Pizza

January is a busy month.

The end of the semester ends soon, and that means tests are flying left and right.  I'd talk about midterms and class scheduling, but there's no need to bring those stressful things into a food blog, right?

Well, anyway, January is a really busy month.

But that doesn't mean you can't make pizza.

Yeah, so my mom works late this time of year, so I helped out her by making the family some pizza.  The healthy kind.

There's honey, it's completely whole wheat, and the only fat in the crust really is the tablespoon of olive oil.  And it's delicious.  So good.  I threw in some dried herbs to add a nice subtle flavor. It's soft and chewy the way pizza crust should be. It's a great recipe for a week night if you're home around two or three.

So, to save time, I just threw all the ingredients in a bread machine.  You can hand-knead it if you like.  It doesn't really matter. I also kept the dough in a warm oven to make it rise faster after the first rise.

I made roasted red peppers to top the pizza with.  It's one of my favorite toppings and I love the smell of them roasting.  Here's the link.

You can top the pizza any way you like.  I used baby arugula, fresh tomato, roasted red pepper, onions, and roasted red pepper.  I also used store-bought pizza sauce and fresh mozzarella.

Note: Hey, I actually made this pizza last Tuesday and I apologize for not putting it up earlier.  Just a note: next week is midterms for me and I probably won't post anything because I have a ton of studying to do.

Whole Wheat Pizza Dough

Makes 2 thin crust or one thick crust pizza.  Serves about 6

Ingredients


1 teaspoon honey
 1 1/2 cups warm water (about 110 degrees F)
 1 tablespoon active dry yeast
 1 tablespoon olive oil
 1 teaspoon salt
 3/4 cups whole wheat flour
1 tbs dried herbs (I used oregano and basil)

Put the ingredients in a bread machine in order suggested by manufacturer. (Alternatively, place honey in water and stir until combined.  Add yeast and let sit 10 minutes until bubbly.  Stir in olive oil, herbs and salt, then add flour.  Knead on a floured surface until smooth. Place in an oiled bowl and turn dough to coat. Cover with a towel or plastic wrap and let rise until double, about 1 hour.)\

Once the dough is doubled, place it on a floured surface.  Split it into two if you want 2 thin crust pizzas. Form into a tight ball.  Cover in plastic wrap and place in a warm place to rise until double (about 45 minutes).

Preheat oven to 500*F. Prepare a baking sheet or two by putting a piece of aluminum foil on it, greasing it with oil or cooking spray, and then sprinkling on cornmeal or semolina flour.  Place dough ball onto a floured surface.  Press down edges.  Roll with a rolling pin as far as it can stretch.  Then, place the dough on your knuckles and turn it to stretch it more. Place the dough on the prepared baking sheet.  Bake it for five minutes without toppings.  Then remove it from the oven and turn oven temperature down to 425*.  Add desired toppings and bake in oven for additional 13-15 minutes, depending on thickness.


Sunday, January 6, 2013

Unforgettable Almond Cookies


Toasted ground almonds
I tried these cookies for the first time at my church, and yes, they were unforgettable.  I think that they were store-bought, but I had my heart set on recreating the almond flavor and the crisp texture.

Coincidentally, my mom had just roasted some almonds the night before, and I had ground almonds, left over from macarons I made a couple of weeks before, in the refrigerator.

So I had to make these cookies. Even if it meant procrastinating my homework.

Vanilla sugar
I adapted these from All Recipes, adding a bunch of things and changing amounts. If you're using almond meal, toast it for a couple of minutes at 350*F until fragrant.  Almond meal is a bit pricey and hard to find, so you can also toast almonds for about 6 minutes, then put them in a food processor or blender on "grind" until they are a fine powder (if you grind it for too long, it will turn into a paste.)

I used vanilla sugar, which is really easy to make if you have vanilla beans.  Use the seeds to bake something else and put the empty pod in a container with 1 cup of sugar.  Close the container and the sugar will be infused with vanilla flavor in a week or so.  If you don't have it on hand, you can use regular sugar and a bit of vanilla extract.

So anyways, these cookies are really easy to make, and the flavor is an almond-lover's dream.  It's a very unique cookie and a new favorite of mine.  It's soft on the inside and crisp on the outside.  It may even be better than the ones I had at church.

And they were really quick to make so I have plenty of time to do my homework!

Unforgettable Almond Cookies

makes about 20 cookies

Ingredients

1/2 cup butter, room temperature
1/2 cup vanilla sugar (or regular sugar)
1 large egg
1-1/4 tsp almond extract
1 tsp orange zest
3/4 cups all-purpose flour
1/8 tsp cinnamon
1/2 tsp salt
1 cup toasted ground almonds
1 large egg white (2tbs) and one tbs water (to coat)
About 20 whole toasted almonds

Directions

Preheat oven to 400*F. Line a large baking sheet with parchment paper.

Cream together the sugar and butter until light and fluffy (about 5 minutes). Add the egg, extract, and zest.  Mix until well combined.

In a small bowl, whisk together the flour, cinnamon, and salt.  Add to egg mixture and mix until incorporated.  Add ground almonds and mix until just combined.  

Roll a little less than a tablespoon of dough into a ball and place onto the sheet and repeat.  Press your thumb or the end of a wooden spoon into the dough. Then press one almond into each indent.  Whisk together the egg white and water and brush onto the dough.

Bake for 9-11 minutes, until edges are golden brown.  Remove from the oven and let rest on the baking sheet for a couple of minutes until transferring the cookies to a cooling rack to cool completely.  Keep in an air-tight container.  


Tuesday, January 1, 2013

Crème Brûlée


Ina Garten said, "Creme Brulee is the ultimate 'guy' dessert. Make it and he'll follow you anywhere." 

I love Ina Garten.

Though I definitely am not making crème brulee to impress someone, I think that the point is clear: make this once, and everybody will be begging you for more. (And girls will appreciate crème brulee just as much, if you're wondering.)

Crème brulee translates to burnt cream, which reflects on the method used to make it.  It's actually pretty simple.  Scald some cream, mix it with egg yolks and sugar, then cook it in water bath (bain-marie) until it jiggles like Jell-O. Finally, sprinkle some sugar on top and torch it.  The result is crackly, sweet shell protecting a luscious, creamy center.  And the flavor is amazing.  Nothing I know can compare to it. 

I have always wanted to try making crème brulee, but until my loving sister gave me a set of ramekins and a torch for Christmas, I was unable to.  But don't worry if you don't have a torch--I'll include instructions in the tips for using a broiler instead, which you should have in your oven. 

Here are a few tips before you start:
  •  Temper the egg mixture by adding the milk in a thin stream. If you don't, you'll end up with a bunch of egg curdles (which is o.k. since you'll eventually strain them out.)
  • When pouring hot water into the pan, be careful.  Bunch the ramekins up on one side of the pan and pour water on the other, and do so before putting it in the oven, to be safe. Use two pans if you have to, but bake one at a time.  If you get a little bit of water in the ramekin, leave it. When the crème is done cooking, just pour out the excess liquid.
  • Don't over-cook.  The crème brulee is done when it is a little jiggly, like Jell-O.  If it sloshes, it needs more time, if it doesn't jiggle at all, it's over-done (in which case it just won't be just as creamy.)
  • Flavor with a vanilla bean. This gives it a beautiful, inimitable flavor that will wow your taste buds.  (You can, however, add 2tsp vanilla extract to the strained mixture.)  Vanilla beans are cheaper if you buy them online.
  • If you don't have a torch:  Preheat broiler.  Place ramekins in roasting pan and fill with ice water (so it doesn't cook.)  Sprinkle about 2 tsp. sugar and spread over tops.  Place pan under broiler, about 2-3 inches below heat source.  Close oven and watch ramekins.  Remove when the tops are dark golden brown. 
The process is similar to making pastry cream, like I did with the gateau basque cake.  Once you get a hang of it, I'm sure you'll find it much simpler and it'll become one of your favorites.


Scalding the cream.

Adding it to the egg mixture.

I used a ladle to pour the mixture into the ramekins.

Carefully pour hot water into the roasting pan.
Burning the cream.


Crème Brûlée

Makes 8 servings
from Flour by Joanne Chang

Ingredients

1-1/2 cups (360g) heavy cream
1-1/2 cups (360g) half-and-half
1 vanilla bean, split
8 egg yolks
3/4 cup (150g) white sugar, plus some for sprinkling
a pinch of salt

Directions

  1. Place a rack in the middle of the oven.  Preheat to 325*F.  Place (8) 4-oz ramekins in a large roasting pan with at least 3-inch sides (use two pans if you have to.)
  2. In a medium saucepan, combine the cream and half-and-half.  Scrape the seeds out of the vanilla bean and add to the mixture, then add the pod.  Place over medium-high heat and scald (not boiling, bubbles start to appear around edges.)
  3. Meanwhile, whisk egg yolks until blended in a large bowl.  Stir in the sugar until combined.  Slowly pour the hot cream in a bit a a time, in a small stream, and whisk constantly.  Strain mixture into another bowl, pitcher, or liquid measuring cup.  Stir in the salt.
  4. Dividing evenly, pour custard into ramekins (if you aren't using a pitcher, use a ladle.)  Carefully pour hot water in the roasting pan until the water reaches the level of the custard.   Cover with aluminum foil or a baking sheet and really carefully move to the oven.
  5. Bake for 20 minutes.  Lift up the foil and jiggle the pan.  If the custard is sloshy and liquidy, it needs more time.  If it jiggles like Jell-O, it's done, and if it doesn't jiggle, it's over-done.  Add more time if necessary.  Carefully remove pan when done and let cool until cool enough to handle.  
  6. Refrigerate ramekins in an air-tight container for at least 1 day and up to 4 days.
  7. Sprinkle about 2 tsp of sugar on top of each ramekin. Light a torch and wave it about 1 inch above the sugar, caramelizing it until it is a dark, golden brown.  
  8. Let cool for 5 minutes and serve, or refrigerate a few hours before serving.